Showing posts with label baking. Show all posts

Friday, February 19, 2016

Waste

After reading the book The Life Changing Magic of Tidying Up last year, I made it one of my goals to declutter and streamline my belongings.  At first, it was quite easy to do. I had accumulated many useless things over the years, and the pile of thrift store donations grew quickly.

I loved the feeling of getting rid of all those unused clothes and household items, because it made our house immediately feel more spacious and tidy. I also loved having an excuse to visit the thrift store, because it would give me a chance to look through the store and discover quirky items or bargains. But the more often I went, the more I noticed how much of the store was filled with garbage. Lots and lots of cheaply made, useless, ugly garbage.

Since then, I've been trying to be more mindful about our household consumption and waste habits. My partner and I recently attempted an experiment in reusing food waste, by using leftover buttermilk and dredging flour mix from a fried chicken recipe. The buttermilk and flour mix were diverted from the trash, into buttermilk biscuits to accompany our chicken dinner.

The experiment was a partial success. We ended up with a dozen paprika-tinged biscuits that were as tender and fluffy as they should be. Only these were terribly salty, on account of the TWO TABLESPOONS of salt that went into the flour mix. Which begs the question of which is more wasteful: throwing out the buttermilk and flour mix, or forcing yourself to eat salty-as-hell biscuits in the name of waste reduction?

In any case, it was a good reminder to use only what you really need.

Wednesday, January 13, 2016

Breakfast At Home

Before I had kids, one of my favourite indulgences was weekend brunch.  I loved going to those small, hip brunch spots with my friends, so we could chat about this and that, while eating a greasy plate of eggs and home fries.  After brunch, I would usually talk a leisurely walk around the neighborhood for some good ol' people watching and to poke my head into a few shops.  It all felt so footloose and fancy free.

These days, going out for brunch poses some interesting challenges: getting the kids ready and out the door, finding a neighborhood place with good food and no line-up, and scoring a big table that will seat ourselves and our friends.  That's why I'm quite happy having breakfast at home.  If we do a bit of advance planning, we can cook and serve up a good breakfast before 9am (hangry hour).  Unplanned breakfast is usually toast, sunny side up eggs, and a banana.  Nothing too exciting.  But when we put in some time and thought the night before, breakfast can be great, even on a time-crunched weekday.  Like this family favourite: an apple crisp baked the night before.  It has only a touch of sweetness and a ton of fruit so it still feels healthy, but it's sweet enough to keep everyone asking for more.

Breakfast Apple Crisp
Adapted from Smitten Kitchen.  Makes 4-6 servings.

Fruit crisps are very forgiving; you can easily substitute the ingredients and it will still turn out delicious.  Berries for apples, whole wheat flour for ground almonds, milk for orange juice, butter for coconut oil, maple syrup for brown sugar, pecans for sunflower seeds... I can go on forever.  I've made this breakfast crisp over a dozen times last year, and the below permutation is my favourite.  I like to leave the skin on the apples; it lends a nice texture, colour, and a bit of extra fibre.

This crisp just happens to be gluten-free and vegan.

Filling:
6 medium tart apples, such as Cortland, cored and cut into thin chunks (approx. 2 lbs)
1 tbsp lemon juice
1 tsp ground cinnamon
2 tbsp corn starch
1 tbsp brown sugar

Topping:
3 tbsp (45 g) coconut oil, warmed slightly to liquefy
3 tbsp (45 g) olive oil
3 tbsp (40 g) brown sugar
1/2 cup (50 g) ground almonds
2 cups (180 g) large-flake oats
1/4 cup (20 g) unsweetened flaked dried coconut
1/4 cup  (35 g) raw sunflower seeds
1 tsp whole brown flax seeds
1 generous pinch of kosher salt
Juice and zest of 1/2 an orange

Preheat the oven to 400F.  Grease an 8x8" square glass baking dish with coconut oil.  Put the apples in a large bowl, and add the other filling ingredients on top.  Toss together, and dump into the baking dish evenly.  Set aside.

In another large bowl, use a wooden spoon to mix the liquid coconut oil, olive oil, brown sugar, and ground almonds into a slurry.  Stir in the oats, coconut, seeds, and salt.  Pour in the juice and zest, and mix well.  Spread the topping over the apples, pressing it lightly and smoothing it out to ensure even browning.

At this point, you can cover with plastic wrap, and keep it overnight in the fridge to be baked in the morning.  Or, you can bake it straight away - at 400F for 30 minutes, or until the apples are bubbling and the top is golden brown.  Serve warm, or do what I do: cool to room temperature and cover with plastic wrap, and store it in the fridge until the next morning.  Pop it in the microwave for a couple of minutes, and serve with a scoop of plain yogurt.

Tuesday, September 29, 2015

Make Cake and Have Fun

Being a perfectionist by nature, I always obsess over every tiny detail (like this guy) when I'm crafting up something.  It can end up killing the fun out of the whole process.

This very tall chocolate birthday cake is the opposite: a silly, ridiculous cake.  Because that's what birthday celebrations should be about, no?  It was originally 7 layers tall, but when I stacked it all up and turned around to fix my camera, the whole thing fell over.  Ah well.  It didn't matter; the recipient loved his weird cake anyway.

Friday, August 21, 2015

Plum Yum

The inevitable happened.  My car broke down while I was driving downtown, with a baby passenger in the back seat.  I was stopped at an intersection, and suddenly my 13-year old car closed its eyes and flew up into car heaven, leaving me, baby, and our nice picnic lunch stranded in a sea of traffic.

We have been shopping for a replacement, but these things take time.  Surprisingly, I've been enjoying this new car-free life.  Walking to my daughter's daycare with her alongside is one of the highlights of my day.  Everything is interesting to her: snails, flowers, big trucks, fruit trees, and stray cats.  On some days after dropping her off, I walk over to the nearby farmers' market and ogle the freshly picked fruits and vegetables.  It was there that I tasted plums that were incredibly sweet and juicy, not at all like the dry and bland fruits that I remember them to be.  Our house has not been plum-free since.

And yet, a small family such as ours can only eat so many fresh plums.  That's when it's time to cook them into warm, soft, sweet, jammy plum foods.  Here is a short round-up of my favourite plum recipes:

- Black Plum Preserves
- Plum Clafoutis
- Purple Plum Torte
- Sugar Plum Crepes

Wishing you plums aplenty before the summer's end!

Tuesday, July 14, 2015

How To Thank A Crowd

My poor daughter.  This week she started in a new daycare, again.  New environment, new faces, new rules, and this time, a new language (French).  She cries every morning when I drop her off, and my heart breaks every time for her.  It is not lost on me that the decisions I make today will completely alter my children's future.  It's a frightening thought.  I hope we're doing the right thing, but it can be hard to see the bright future ahead when the tears of today are clouding our sight.

We thanked the staff and teachers from her previous daycare with a large box of salted dark chocolate chunk cookies.  Instead of making a thank you card, I wrote down our sentiments on a slip of paper, and packing-taped it along with some eye-catching graphics to a cardboard tray (leftover from an Ikea purchase).  Covering the tray with cookies leaves the recipients only one option if they want to uncover the hidden message underneath: eat lots of delicious cookies.

Parting is such sweet sorrow.  I'm going to miss those guys.

Monday, April 13, 2015

Priorities

In 2012, after returning from a year of travelling and with my head still in the clouds, I decided to start this blog.  It was my dream to immerse myself into a crafty life, and document and share it here.  Three years later my toes have barely dipped in, and I look back with mild disappointment that this blog never realized its potential.  At this time, I have decided it would be best to let go of my www.craftbandit.ca url and aim to write here once every few weeks, so I can reshift my focus on other things.  I feel a little sad, but I know it's the right thing for right now.

A new priority popped into my life in January, when our little family of three became four.  This new little baby had me wrapped around her tiny pinky finger the moment I first saw her, and the weeks that followed were a blur of excitement and emotion.  Not to mention hunger.  Oh, the hunger!  I could never find enough time (or food) to eat my fill between catnaps, appointments, and marathon breastfeeding sessions.  I was fortunate to have friends and family that brought over meals for us so we didn't have to cook.  And when those meals were all eaten up, I was fortunate to have lots of granola around to feed my endless hunger.

Granola is serious power food for a new mother.  Not only is it energy dense, but the oats in the granola help boost milk supply and iron levels.  I craved granola so much that I couldn't even keep a full bowl around long enough to take a decent photo (which looks mostly like sliced bananas than granola).  Often I was wolfing down granola while washing dishes, talking on the phone, or doing laundry, so forget trying to get my camera out and getting the best angle and light.  Since discovering how much my postpartum self loved granola, I have made and gave jars of granola to other new mothers.

True, the world does not need another granola recipe.  But because there are so many good ones out there, I have to pick and choose my favourite.  I like my granola full of nuts, fruits and seeds, and just barely sweetened with brown sugar, instead of honey or maple syrup.  I can always add honey or maple syrup straight into the bowl later on where I'll be better able to taste it right upfront.  I also use orange juice in place of some of the olive oil, to keep it on the lighter side.

One last tip: try your granola with a sprinkle of nigella seeds (also known as kalonji or black caraway seeds, found in your local Indian grocery store).  The bitter, smoky flavour of those tiny black seeds will make for a more grown-up taste.

Mama's Power Granola
Makes 2 L, enough for 2 weeks of between-meal snacks for a hungry mama.

5 cups (425 g) old-fashioned rolled oats
1 cup unsweetened dried flaked coconut
1/4 cup raw sesame seeds
1 cup raw pumpkin seeds
1/2 tsp salt
1 tbsp ground cinnamon
1/2 cup (85 g) brown sugar, packed
1/4 cup orange juice (or the juice of 1 medium orange)
1/2 cup olive oil
1 cup dried sweetened cranberries
1 cup pitted dried dates, roughly chopped

Preheat the oven to 350F, and line a half-pan baking sheet with parchment paper.  Place the oats, coconut, sesame seeds, pumpkin seeds, salt and cinnamon in a large bowl.  Stir to mix, and set aside.

Combine the brown sugar and orange juice in a small saucepan, and heat on medium to dissolve the sugar.  Add the olive oil, and stir.  Pour over the oat mixture, and mix well with a wooden spoon.

Dump the contents of the bowl onto the baking sheet, and bake for 15 minutes.  Remove from the oven, stir to ensure even browning, and put it back into the oven for another 10 minutes.  Remove from the oven, stir again, and put it back in the oven for another 5-10 minutes.  Remove from the oven when the granola looks golden brown, and leave it in the pan to cool completely, at least 1 hour.  Pour it into a large bowl, and mix in the cranberries and dates.  Store in airtight glass jars for up to 1 month.

Wednesday, January 21, 2015

The Year Ahead

 When January rolls around, I usually like to do a little reflection on the past year, and also my hopes for the upcoming year.  I feel like it's a nice little grounding exercise to gage where you're at with everything, feel good about what you've done, and pick out a few things that you'd like to see change.  I'm working on keeping things simple for this year: focus on a few things, but doing those few things well.

Gardening.  This is the first year I'll be able to plant seeds into the ground, instead of a pot.  Our garden space gets lots of sun (hurrah!), but also lots of foraging animals (boo).  I'm looking forward to planting lots of edibles, and learning what works and what doesn't.

House.  Continue to build our new home into a happy, useful, beautiful space for our little family.

Craft.  Start an heirloom recipe collection.  We have a number of recipes we use all the time (Alice Waters' Roast Chicken! Smitten Kitchen's crepes! Jim Lahey's pizza dough!), and I'd love to write them down, store them well, and share them with my kids and their kids.  Also, I'd like to try to improve and develop recipes I've tried, instead of always using new ones every time.

Photos.  Learn to take better photos by taking more photos.

Family.  Set aside weekly 1-on-1 time for each person, including myself.  Speaking of which, I've been really enjoying my new mid-morning ritual of tea and snack.  More on that another time.

These pecan sables are the last thing I'm going to bake until the baby arrives.  I made milk chocolate chip sables over Christmas for gift giving, and at first I was unimpressed at how bland they tasted.  But over time, they became my favourite cookie of the lot, and I've made lemon sables and pecan sables since.  I've quite grown to appreciate their simplicity: a tender crumb of butter, flour and sugar, blended in harmonic proportions.  Seems like a fitting edible mascot for my 2015 resolutions.

Pecan Sables
Adapted from Orangette and A Taste of Home.  Makes about 2 dozen cookies.

1/2 cup (113 g) unsalted butter, room temperature
1/4 cup sugar
a pinch of kosher salt
1/2 tsp vanilla
1 cup (130 g) all-purpose flour - I like to use half whole wheat, half white
1/4 cup pecans, toasted (350F for 5 mins), cooled and finely chopped

In a large bowl, mix butter, sugar, salt and vanilla together with a wooden spoon until well combined and smooth.  Add flour and mix until just combined.  Add pecans and mix until just combined.  The dough will look crumbly, but if you squish it between your fingers, it will stick together nicely.

Dump the dough onto a large piece of plastic wrap, at least 16" long.  Form the dough into a log shape as best you can, using the wrap to help ensure the dough is packed tightly and dense.  The cookies don't spread much, so your log diameter should be the size you want your cookies to be.  I usually like my cookies about 1-1/2", and so my log ends up being about 10" long, but you can go larger or smaller if you like.  Just make sure you adjust your baking time accordingly.  Wrap the dough log in the plastic wrap, and place in the fridge for at least an hour, and up to a week.

When you're ready to bake, preheat the oven to 350 F.  Remove the dough from the fridge, and slice into 1/2"-thick rounds with a very sharp knife.  Place on a cookie sheet lined with parchment paper, and bake for 10-12 minutes, until their bottoms are golden brown and the edges are turning slightly brown.  Remove from oven, and move onto a wire rack to cool completely.  Store at room temperature in an airtight container for up to a week, or wrapped in the freezer for up to a month.

*Feb 25/15 UPDATE: Sesame Sable variation - substitute pecans for 1/4 cup toasted sesame seeds, and vanilla for 1 tsp toasted sesame oil.  Before slicing the dough, brush 2 tsp milk all over the outside of the log, and sprinkle 2 tsp raw sesame seeds on top.

Wednesday, December 24, 2014

Homemade Holidays

Phew, what a dizzying few days-weeks-months it's been.  As usual, I've driven myself into the ground with my own demands and expectations, and I'm exhausted from it (but happy).  I'm just getting over the flu, but managed to co-host 3 dinner parties this month, made and packaged a small mountain of gifting goodies, and now all the freshly sewn stockings are hung, the first-Christmas-tree-I've-ever-owned-in-my-life is decorated and lit, and all the presents are wrapped and ready for tomorrow.  I can't help but feel like I've accomplished something pretty great, and I'll bet anything that I'm not alone.  Cheers to us, friends and comrades, for pulling off a good year.

The unfortunate part is that during all the chaos and commotion, I didn't stop to take any photos.  Only just one from today's cookie making session, of the funny looking Siamese triplet cookie that resembles my family.  First 2015 resolution: take more photos.  More better photos.

For future reference, here's a list of holiday gifting edibles I made, with cook's notes:

  • A jar of chestnut spread (confiture de marron), for my gluten-free, food loving friend.
    After a couple of hours of work boiling and shelling the nuts, I froze them for a couple of weeks until I was ready to make the spread, to ensure the longest fridge life possible.  I used a ratio of about 60% unshelled chestnuts and 40% white sugar, cooked with water and vanilla extract for about 20 mins.  About 2-3 lbs of shelled chestnuts made just over 2 x 250mL jars of spread.  The spread itself was delicious, but it's a lot of work for a little bit of spread.
  • Eight packages of strawberry pate de fruits, for my co-workers.
    Never again will I use pectin.  I used a whole bag of thawed frozen strawberries (600g), reduced the sugar (400g), and used pectin crystals (about 3/4 package).  After the whole process was done and waiting a few hours for it to set, it turned out to be still liquidy, so I'm now using it as refrigerator jam. Next day: same thing, but increased sugar (500g) and pectin (1-1/4 package).  The pate set, but it was quite soft still, and tasted less like candy and more like, well, jam.  I cut and rolled the pieces in sugar, packaged them up into gifts, and gave each one out with an explanation and apology.
  • Five packages of mixed cookies (ginger cookies and milk chocolate chip sables), for my neighbors and friends.
    After my candy making fiasco (see pate de fruits), I decided to stick with what I know best: baking.  The ginger cookies were soft and chewy, but a bit flat-shaped; I opted to substitute shortening for butter, light molasses for dark (blackstrap), and 2/3 the brown sugar for white. Rolling the top in coarse sugar is recommended, instead of regular granulated sugar.  Turns out those milk chocolate chip sables (substitution of cocoa nibs for chopped milk chocolate) are the perfect small treat with coffee; I just can't figure out how to make them shape well and not flatten out at the base.  Sharper knife, perhaps?
  • Four small Christmas cakes, for serving at dinners and as host gifts.
    After years of wanting to make a proper Christmas cake (at least 1 month of aging with regular 'feedings' of booze), I finally carved out some time to do it this year early on.  I loved the process of mixing in all those dried fruits, baking the loaves for hours, and checking on them every few days.  A little like nurturing a living being of sorts.  All the while I seemed to have forgot the part about most people not being all that fond of Christmas cake (despite this one being homemade and yummy), and so I had a tough time finding the right people to accept this sort of gift.
  • One batch of oatmeal trail-mix cookies, as a Christmas Eve family activity and to leave out for Santa.
    At 11 am this Christmas Eve morning, my partner suggests we make cookies with my daughter when she gets home from daycare after lunch, to put out for Santa.  I'm torn about the whole Santa story, but I'm sold immediately on making cookies.  We have ingredients on-hand for my favourite oatmeal cookie recipe.  She helps us mix the batter and shape the cookie balls as best as a two-year old knows how.  A Christmas tradition is born.

As for gift packaging, all were wrapped quite simply: cookies in brown coffee bags with a gold ribbon, mini red ball tree ornament, and green gift tag.  Pate de fruits stacked in small clear cello bags with a green wrappped cardboard base, tied with a gold ribbon.  Chestnut spread in a glass jar, fabric covering the lid, tied with twine, and a label and gift tag attached.  Again, no photos, you just have to trust me.  I'll be better next time, promise.

Happy holidays to all, and to all a good night!

Friday, November 21, 2014

A Quirky Cake

I've been stuck in a creative rut lately.  Mostly I blame my lack of effort and motivation, but even when I do put the time into making something nice, the results are rather blah.  That means that my friends and loved ones have been on the receiving end of plain undecorated cakes, awkwardly gift wrapped presents, or odd-looking greeting cards.  Not the worst thing in the world, all things considered, but it's always a nice feeling when you can deliver a kind gesture with a good first impression.

So when I saw these candy decorated face cakes on another blog, I was inspired.  I really love Erin Jang's illustrations and designs: colourful, simple, and humourous.  Heck, I don't even know if those are cakes in that photo, or what, but I did know I needed a cake decoration idea for a co-worker's birthday cake.  I used an assortment of candies from the bulk store to make a facsimile of my co-worker's face.  It honestly doesn't look that much like her, but it made her smile.

Monday, September 1, 2014

Keeping It Simple

A couple of weeks back, our family packed our car to the ceiling and headed north for a week of folk music festival going, camping, and cottaging.  It was a simple itinerary: 2 days of folk music with 3 nights of camping, and the rest of the week at a family cottage.  We spent our time out there unplugged and disconnected to the world, and more connected and in-tune with our surroundings.  Funny how that works.


We had a lovely time, despite the rain.  Not much actually happened, but then again, so many things happened.  We especially enjoyed exposing our little one to the outdoor life.  She now loves being in a kayak and eating wild raspberries.  She attended her first music festival, had her first nights sleeping in a tent, and saw her first deer, loon, great blue heron, beaver, black bear, and very cool looking striped caterpillar. As for me, I feel more or less like the same person, only notably fresher and renewed.  I've said this before, but I should really start a daily meditation practice, it would do me so much good.


Summer Fruit Crisp
Makes 6-8 servings.

This recipe was written as a head-nod to in-season peaches and raspberries, so I kept it as simple as possible as to highlight the bright flavours of those fruits.  But really, the best part about fruit crisp is how relaxed it all is. All kinds of fruits will work: apple, pear, plums, berries, mango, even banana. The proportions are very forgiving, and I've never had any problems scaling up or down using very approximate math.  Feel free to toss the fruit in a couple of spoons of flour to thicken their juices, or add 1/4 cup of rolled oats or chopped nuts into the topping to make things interesting.

4 ripe peaches, washed and patted dry, peeled (optional) and sliced into 10 pieces
1 cup of raspberries
1/2 cup (70 g) flour
1/4 cup (50 g) brown sugar, lightly packed
1/4 tsp kosher salt
1/4 tsp ground cinnamon
4 tbsp (60 g) cold unsalted butter

Preheat the oven to 375 F.  Lightly grease a 7x7" (or so) square baking pan that is at least 2" deep.  Place the fruit into the prepared pan, and tap it a few times to fill any large gaps.  The fruit should cover the bottom and come up the sides about 2".

In a separate bowl, mix the remaining ingredients together by hand, just until the mixture resembles coarse crumbs and retains its shape when you squeeze a handful in your fist.  Scatter evenly over the fruit; it should cover the fruit nicely.  Bake for 30-40 minutes, until the fruit is bubbling through and the topping is golden brown.  Remove from oven and cool at room temperature for at least 15 minutes.  Serve it warm as-is or as you like it, say, with a dollop of thick yogurt and a swirl of maple syrup.

Friday, April 11, 2014

Hello, Spring

Spring!  The season of possibilities and new beginnings.  And how.  Today it was 15 degrees and sunny, and it sure felt like the whole world was smiling.

I wanted to make a batch of bunny-shaped digestive cookies for Easter, but my nearby supply shop was all out of bunny cutters.  Insert teeth-grinding sound here.  Luckily, bending an inexpensive round metal cutter into a bunny shape worked surprisingly well.  Better yet, it looks like the lovable and sweet Miffy, so I went with it.


Miffy Cookie Cutter

Buy a somewhat flexible, 4" round metal cookie cutter.  A 3" cutter will also work, but you'll need to adjust the measurements accordingly.  Find the seam (where the metal ends are joined), and turn the cutter so that the seam is on the bottom (where the bunny's chin would be).

Directly across from the seam, make a bend that facing inwards.  Push the bend inwards until it is at a 90-degree angle.  Now make two outward bends, located about 1-3/4" on either side of your first bend.  These two bends will form the pointed tips of the bunny ears.  Squeeze the bends together to form the ears, while also pushing the first bend in further.  Lastly, make two inward bends, located about 1-3/4" away from each of the two outward bends.  Now you can make tiny adjustments all over to finish your bunny shape the way you like it.

The final cutter will be about 4" tall and 2-1/2" wide.  If you're looking for something to cut, may I suggest these digestive cookies (frosted or plain), these sweet potato biscuits, or these carrot cake pancakes.

Thursday, February 20, 2014

A Little Mouth To Feed

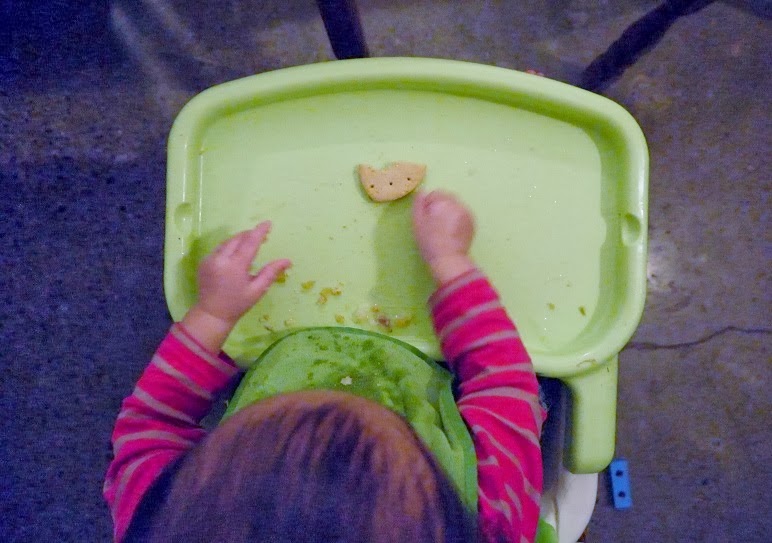
Thinking back to my pre-parenthood days, I'm quite certain that I maintained a steady diet of mostly vegetables, many home-cooked meals, and almost all whole foods.  After the birth of my daughter, it seemed even more important to stick with it, as we wanted her to learn the meaning of "real food" by immersion.  I was committed to the idea that making the right decisions at a very early age would help her foster a positive relationship with food, with the goal of raising a polite, mannerly child that enjoys trying new food, knowing where it comes from, and actively participating in family meals.

When the time was right, I did a fair amount of research on baby foods and eating habits.  I went ahead and introduced foods one at a time, selecting the best of the season and cooking each one lightly as to let its inherent flavour shine through.  In the beginning, she pretty much ate whatever I offered, and always wanted more.  But sometime before her first birthday, she started to show clear likes and dislikes.  She began to drop food on the floor, spit food out, and push away the spoon.  Coaxing, sneaking or hiding food, scolding, and praising, I tried it all with very little success.  Worst of all, mealtime was starting to feel like a losing battle.

The decision was clear.  Building the family meal ritual was much more important than making sure she finishes her broccoli.  Mealtime should be relaxed, social, and simple: a moment set aside each day for sharing food and enjoying company at the dinner table.  After all, real nourishment does not come from food alone.

It's still a work-in-progress, but I'm getting pretty excited thinking of all the family meals of the future.  After all, my little girl is growing up in a home that loves food.  What's there not to love about that?

P.S.  For more first-hand stories on the subject, you really must read this.  And as much as I enjoy the idea of being free-flowing and chill, these parent-child responsibilities appeal to my linear side.


Digestive Biscuits
Adapted from King Arthur Flour.  Makes 32 2-inch biscuits.

These whole-wheat biscuits only have a touch of sweetness to them, appealing to both toddlers and adults alike (even more so to the latter with a cup of tea and a dollop of jam).  I cut them into heart-shapes for Valentine's Day to give to my daughter's little buddies, but any shape works.  The cutting scraps can be re-rolled and cut again; the biscuits cut from the 3rd re-roll were just as good as the first.

1/2 cup (60 g) all-purpose white flour
1-1/2 cups (180 g) whole wheat flour, pastry or all-purpose
1 tsp baking powder
slightly heaped 1/4 tsp kosher salt
1/2 cup (113 g) unsalted butter, room temperature
1/3 cup (45 g) icing sugar
1/4 cup cold milk

Preheat oven to 350 F.  Line a baking sheet with parchment paper, or lightly grease with unsalted butter

In a large bowl, combine flours, baking powder, and salt.  Add butter, and mix coarsely with a wooden spoon or your hands.  Stir in sugar and milk until it comes together.  The dough may feel sticky at first.

Turn dough out on a floured surface, and knead until smooth.  Using a floured rolling pin, roll the dough out to just over 1/8" thickness.  Cut out desired shapes, and place on prepared baking sheets, spacing biscuits at least 1/2" apart.  Prick all over with a fork or skewer.

Bake for 20 minutes, until the edges just start to brown.  Remove from oven and leave on baking sheet to cool for 10 minutes.  Remove and cool completely on a rack.  Store in an airtight container for up to 3 days, or well-wrapped in plastic in the freezer for a month.

Sunday, February 9, 2014

Tradition

Today's blog post was first written on a scrap piece of paper while riding the subway home from work.  As I was scribbling down my thoughts, I noticed the person sitting next to me was busy tapping away on a tablet device.  In fact, so was the person across from me.  My pen and paper suddenly feels isolating.

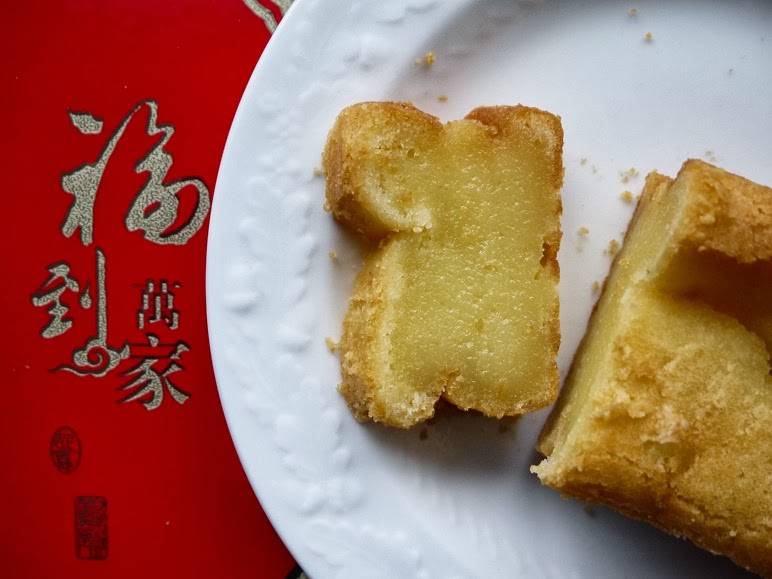
The recipe I'm sharing with you today is very special to me, because of scribblings on a piece of paper.  It is the only recipe my mother has ever written down and passed to me.  It was her friend's recipe, who first made it for our family over ten years ago, and we loved it.  My mother wrote down the instructions in English on a piece of computer paper ripped in half, shortly after her friend recited it to her in Cantonese.  I then took that recipe and wrote it down into my little recipe notebook, which kept no more than a dozen recipes that I had tried only once or twice.  That notebook was a well-intentioned project to document some of my favourite recipes, which now, a decade later, I have decided to re-instate with the purpose of publishing an heirloom recipe collection for my own daughter.  The only recipe from that old notebook that will live on through the generations is this one.

This is a recipe for a sweet Chinese New Year cake.  It's not the traditional steamed cake with the red date on top, but a richer, baked cake that deserves to be made more often than just once a year.  Although it is a new year cake, it's not a celebration cake as we would normally think of it.  No candles are lit, no song is sung.  Instead, it's a subtle cake with a memorable character that is shared with your guests, or brought into a home to be shared.  The glutinous rice flour gives a soft, chewy texture similar to mochi, but the baking process browns the edges to a firm, toothsome crumb.  It's lightly sweetened, enriched with eggs, perfectly scented with coconut milk, and has all the makings of a new annual tradition in my family.


Coconut Custard Mochi Cake
Makes 2 x 8" square cakes, 2 x 9" round cakes, 24 muffin-sized mini cakes, or 4 mini loaves

This recipe calls for 1 cup of coconut milk, which is just over half a can (400 mL).  Unfortunately, coconut milk doesn't keep well in the fridge once the can is opened; I find it is questionable after 2 days, unusable after 3 days.  The good news is that coconut milk freezes nicely.  Freeze the unused portion of the can right after you open it, unless you're planning to use it the next day or so.  Defrost frozen coconut milk in the fridge for 12-24 hours, and stir it well before adding it to the recipe.

1 cup coconut milk, full-fat
1 cup milk (skim, 2% or whole)
1 cup (200 g) granulated sugar
3/4 cup light-tasting vegetable oil, such as canola
1 package (400 g) glutinous rice flour
2 tsp baking powder
1 tsp kosher salt
3 large eggs

Arrange one oven rack on the top third of the oven, and a second rack on the bottom third.  Skip this step if making 4 mini loaves, as all 4 pans will likely fit on one middle rack.  Preheat oven to 350°F.  Generously grease pans with unsalted butter.

In a medium bowl, mix together coconut milk, milk, sugar, and vegetable oil until well-blended, and set aside.

In a large bowl, combine rice flour, baking powder and salt.  Pour in the milk mixture, and stir well.  Add one egg at a time, stirring in between, until the batter is smooth.  Divide the batter into the prepared pans, being careful not to fill right to the top to allow for rising.  The batter will puff up quite a bit while rising in the oven, but does stay relatively firm and likely won't overflow if you've left a little room.

Place one pan on the upper rack, and the other pan on the lower rack.  If making mini loaves, place all 4 pans on middle rack.  Bake for 30-35 minutes for muffin-sized cakes or mini loaves, or 35-40 minutes for 8" square cakes or 9" round cakes, switching pan positions and giving each pan a turn halfway through cooking time.  The cakes are done when a cake tester inserted into the middle of a cake comes out clean, and the tops are a lovely golden brown colour.  Remove from oven and cool in pan for 30 minutes on a cooling rack.  Carefully remove cakes from pans, cooling completely on rack.  Store in an airtight container at room temperature for up to 3 days.

Thursday, December 19, 2013

Last Minute Holiday Cookie Package

'Tis the season to be baking, my friends.  Have you been keeping your oven warm and your loved ones off their diet?  As for me, oh sure, I had visions of snowflake-shaped speculoos, chocolate florentines, and pistachio nougats dancing in my head.  But with less than a week until Christmas and not a cup of butter creamed, not a chocolate block chopped, nor icing piped, I needed to get real.  Fast.

I ended up making shortbread cookies.  I remembered a recipe off the top of my head: 1 part icing sugar, 2 parts butter, 3 parts pastry flour.  Ive made this recipe nearly a half dozen times.  I'm always slightly disappointed in how it turns out, but that part I always seem to forget.  Sigh.


I still gave these not-so-stellar cookies the full gifting treatment, packing them pretty in brown paper coffee bags.  These ingenious bags are quite sturdy and lined with plastic, perfect for carrying and storing cookies.  And hey, if you're slick, they are freely available in the grind-your-own coffee beans section of the grocery store.  Tie on a generous-sized ribbon with a gift tag, and ahoy!  These lovely package of homemade sweets are ready for giving.

Wishing you all a festive holiday season!  See you in 2014!

Friday, August 16, 2013

Midnight Pie


Wednesday evening, just after midnight.  My partner is fast asleep on the couch, with a belly half full of soup.  He's waiting for the main course of our dinner, a zucchini tart, to finish baking in the oven.  I'm puttering around in the kitchen, wondering how I ended up spending four hours making said tart.

A book about how the French eat is partly to blame.  This book impressed on me that in France, spending hours preparing and enjoying three-course meals is part of their daily life.  This romantic notion made me wonder if I, too, could craft a slow meal microculture in my family.

The neighborhood pie shop is the other culprit.  A friend bought one of their strawberry rhubarb pies to our house, and our expectations were quite high, considering it came from a shop that specializes in making pies.  Just pies, nothing else.  Oh sure, if you like your pies with a skimpy, pancake-thin layer of fruit, then these guys were bang on.  Otherwise, if you're like me, you would have been left feeling very unsatisfied, maybe even a little cheated, wondering when will be the next time you could make a pie to prove that better pies do exist.

A few days and a cup of coffee later, I plunged my hands into a large bowl of flour and butter, and formed the beginnings of a tart dough.  The clock reads 8:45pm, and the evening sky cools to a deep purplish grey hue.  I haven't eaten a thing since lunch, but I already feel contentedly indulged.


Zucchini and Cheese Tart
Adapted from Martha Stewart (dough) and Smitten Kitchen (filling).
Makes one 9" tart.

This summer vegetable tart is a real knockout, and would look perfect on a patio table beside a Greek salad and watermelon slices.  If you want to spread the preparation over several days, this can easily be done by 1) preparing the tart dough in advance and keeping it in the fridge or freezer, and 2) letting the raw dough (prior to blind baking) sit in the fridge overnight.

For the dough:

1-1/4 cup (170 g) all-purpose flour, plus more for dusting
1/2 tsp salt
1/2 tsp sugar
1/2 cup (113 g) unsalted butter, cold and cut into cubes
ice cubes and cold water

In a large bowl, combine flour, salt and sugar.  Mix in the butter with your hands, by smooching the butter across your fingers using your thumb, shaping the butter into thin slice-shapes.  Continue until the butter pieces are about the size of peas.

In a small bowl, stir a few ice cubes with 1/4 cup of cold water, and wait for 1 minute.  Remove 3 tablespoons of ice water, and add to the flour-butter mixture.  Blend it all together with a wooden spoon briefly until dough just starts to hold together.  Add a tablespoon or two more ice water if needed.

Turn the dough out onto a clean surface, and knead together just until a rough ball forms.  Flatten into a disc shape, and wrap in plastic.  Chill in the fridge for at least an hour.  At this point, the dough can also be stored in the freezer for up to a month.  It should be thawed in the fridge overnight before using.

Preheat oven to 375°F.  Remove dough from fridge, and leave at room temperature for 10 minutes.  Discard plastic, and place dough on a clean, floured surface.  Using a floured rolling pin, roll the dough out into a circle.  Be sure to turn and move the dough in between rolls to prevent it from sticking to the rolling surface.

Once your dough circle is at least 11" in diameter, carefully transfer it into the tart pan.  Push it down into the corners gently, and trim edges to fit.  Poke the bottom of the dough several times with a fork, and line the top with a piece of aluminum foil.  Fill with dried beans or pie weights, and bake for 15-20 minutes, until the crust is just barely browned.  Remove from oven, and remove foil and weights.  Using the same fork, re-poke the holes you made earlier, and cool the crust for at least 10 minutes before adding the filling.

For the filling:

1 large or 2 small zucchinis, sliced into 1/8"-thick rounds
1/2 tsp kosher salt
1 clove garlic, minced
1/4 tsp fresh ground black pepper
1/4 cup soft chevre (though ricotta, cream cheese, or other soft mild cow/goat/sheep cheese should also work)
1/4 cup grated parmesan cheese
1 cup shredded mozzarella cheese
1 to 2 tbsp milk, any type (such as skim, 2%, cream, even buttermilk)
1 tsp olive oil
1 to 2 tsp chopped fresh herbs (such as tarragon, basil, parsley, and/or dill)

Lay the zucchini slices out onto a clean tea towel.  Sprinkle salt evenly onto each slice, and wait 30 minutes.  Using another tea towel, blot away excess moisture and salt from the surface of the slices.

Preheat oven to 400°F.  In a small bowl, mix together garlic, ground pepper, chevre, parmesan, 1/4 cup mozzarella, and 1 tablespoon of milk.  If the mixture is too thick and not quite spreadable, mix in the second tablespoon of milk.  Spread onto the base of the crust as evenly as possible, using your fingers if needed.  Sprinkle on remaining 3/4 cup of mozzarella, and arrange the zucchini rounds on top.  Brush the zucchini lightly with olive oil.

Bake for 30-35 minutes, until crust is deep golden brown.  Remove tart from oven, and immediately scatter fresh herbs on top.  Cool for at least 15 minutes on a rack, before slicing and serving.

Saturday, July 13, 2013

Keeping Afloat

On Monday night, Toronto was hit with a severe and unforeseen thunderstorm.  Many people found themselves without electricity, stranded, or their homes flooded.  Cars were swept away in rushing water, people took shelter under the nearest roof, and emergency vehicles amassed in the quiet streets.

I was one of the lucky ones.  We ate a leisurely dinner at home while our baby slept through the storm.  She didn't even wake when the building's fire alarm shrieked intermittently for over an hour.  My parents were not so fortunate.  Their basement flooded with waist-high sewage water, floating furniture around like bumper cars in slow motion.  Their electricity and phone lines were restored the next day, but until now they have no hot water.  Most of the flood water has drained out, leaving an inch of thick black sludge that smells like gasoline.  Insurance, utility, and restoration companies are suddenly distant and unfriendly.  A lot of chaos over a mere few inches of rain.

Rewind to two weeks earlier.  An upstairs unit in my very close friend's apartment leaked air conditioner fluid down into her home, causing an immediate evacuation.  Fast forward to this morning.  A major fire burned down a corner grocery store in our neighborhood.  The sight of the charred remains was almost too much to bear.  Only a few days ago I was inside the shop, buying a bag of scallions.

It's funny how life can take such a sudden, sharp turn.  One small event can derail even the best laid plans.  When things turn upside down, we seek comfort in the people and things that we know we can rely on: family members, close friends, a favourite place, a familiar face.  We take them for granted, and yet they always give their support when you need them the most.  We are very blessed.


Sweet and Salty Oatmeal Cookies
Adapted from Bouchon Bakery by Thomas Keller and Sebastian Rouxel.
Makes 16 three-inch cookies.

These cookies are thick and generous.  They make great company on a rainy day, especially with a fat mug of warm milk and a wool blanket.  I am convinced that they would form the makings of a game-changing ice cream sandwich, though I haven't tried it out myself.  Though I did accidentally leave out the 1/4 cup of white sugar, which resulted in a not-too-sweet but still very noteworthy cookie that was more snack than treat.  Feel free to substitute the inclusions for your own favourite mix of dried fruit, nuts, seeds, and candy pieces.

1 cup (135 g) all-purpose flour
2 tsp ground cinnamon
1-1/4 tsp baking soda
1 tsp kosher salt
2/3 cup (145 g) light brown sugar, packed
1/4 cup (50 g) sugar
 2/3 cup (150 g) unsalted butter, room temperature
1 large egg
1 tsp vanilla extract
2 cups (155 g) old fashioned oats
1/4 cup unsweetened shredded coconut
1/4 cup mini pretzel twists, salted and broken into pieces
1/2 cup bittersweet chocolate chips
1/4 cup whole peanuts, roasted and salted
one generous pinch of flaky salt, such as Maldon

Position oven racks to upper and lower third.  Preheat oven to 325°F.  Line two half baking sheets with parchment paper.

In a medium bowl, mix flour, cinnamon, baking soda and salt.

In a large bowl, use a wooden spoon to beat the butter until fluffy and light.  Add both sugars and beat until light.  Mix in egg and vanilla until just combined.  Add in the flour mixture in two additions until just combined, being sure to scrape down the sides of the bowl between additions.  Mix in the oats, and then the coconut, pretzels, chocolate and peanuts, only just enough to bring it together.

Using a 1/4 cup measure, scoop out balls of dough and form them with your hands into a thick round patty.  At this point, if you don't want to bake the whole batch, you can place the formed disks on a lined baking sheet for an hour in the freezer, then double wrap them in plastic and store in the freezer for up to a month.  Thaw overnight in the fridge, and leave them out at room temperature for an hour before baking.

To bake, place the raw cookies on the lined baking sheets, spacing them at least two inches apart.  Sprinkle a thin pinch of flaky salt on top of each cookie.  Bake for 14 to 18 minutes, reversing the positions of the pans halfway through cooking.  The cookies will be ready when the edges are lightly browned.  Remove from oven, and cool for 15 minutes before carefully moving them to a rack to cool completely.  Store in an airtight container for up to 3 days.

Friday, May 24, 2013

Picnic Propaganda

Now that it's officially patio season, many of us forget about the sunny afternoon pastime's much neglected poor cousin, the picnic.  And yet, picnics offer much of the same: warm sun, good company, some food, some drink, and a 360 degree view of the world whizzing around you.  But unlike patios, picnics build community and makes good use of shared public spaces.  A picnicked park is a loved park, and more picnics makes life better for everybody.

After the success of last year's epic picnic, I am happy to say that our picnic blanket has been thrown down five times this month, each time in a different park.  The best picnics had the right mix of people watching, cloud gazing, and good food.  The strangest picnic was when we hunkered down in a small patch of green space on a dead-quiet Sunday in the financial district.  Sitting among cigarette butts and sneaking beers sips away from security guards wasn't what we had in mind, but hey, sometimes you have to take what you can get.

Sometimes I daydream about the perfect picnic meal.  Right now, I'm thinking of build-your-own open-faced rye sandwiches, with a variety of cheeses, pickles, grilled vegetables, fresh herbs, sprouts, and homemade pestos.  Perhaps a simple side salad of seasonal vegetables, an intermission of fruit-nut crisps and crackers, a summer fruit pie to finish, and a crisp bubbly to wash it all down.  Then again, on a hot summer day, I might be just as happy with only a lemon popsicle and the shade of a large tree to keep me company.


Cranberry-Walnut Crisps
Adapted from Dinner with Julie.
Makes about 3 dozen.

These dairy and egg-free crisps are great on their own, or alongside cheeses, dips, and antipasto.  Feel free to use any or all dried fruits, nuts or seeds you prefer.

1 cup (135 g) all-purpose flour
1/4 cup brown sugar, lightly packed
1 tsp baking soda
1/4 tsp salt
1 cup unsweetened plain almond milk
1 tbsp white vinegar
1/2 cup sweetened dried cranberries
1/2 cup toasted hazelnuts
1/2 cup toasted walnuts
2 tbsp ground flax seeds

Preheat oven to 350°F.  Grease a 9x5" loaf pan with vegetable oil.

In a small bowl, combine the almond milk and vinegar, and set aside.  In a large bowl, mix together the flour, brown sugar, baking soda and salt.  Fold in the milk mixture until barely combined.  Add the cranberries, hazelnuts, walnuts and flax seeds, and stir until just blended.

Pour the batter into the prepared loaf pan.  Bake for about 35-40 minutes, until golden brown and a cake tester inserted into the centre comes out clean.  Cool for 30 minutes in the pan, then carefully remove and cool on a wire rack.  Once the loaf is completed cooled, double wrap tightly in plastic wrap, and freeze overnight.

The next day, preheat oven to 300°F.  Remove loaf from freezer, and use a sharp serrated knife to cut slices as thin as possible.  Place slices in a single layer on a baking pan, and bake for 20 minutes.  Remove from oven and turn each slice over.  Bake for another 20 minutes, or until crisps are golden brown and crunchy hard.  Cool completely before serving.  The crisps will keep for at least a week in an airtight container.

Sunday, May 12, 2013

Honesty

I read an article recently that speculated a correlation between social media and depression.  The theory was that because people tend to online share only their positive personal experiences, the net effect for a social media surfer is the impression that other people's lives are much more rich and exciting than their own, which in turn leads to a lowered sense of self-worth and depression.  I suppose it sounds logical, but perhaps too simplistic.

Though I do think there is a bit of truth to this idea.  I'm quite certain that all food bloggers cook up failed recipes just like non-blogging folks, but rarely is there any mention of this.  Which is unfortunate, in my opinion, because if blogs are a personal account of someone's life, then there's an important part missing from the story.

But hey, you don't see me doing it.  Case in point: I baked a cake for my father-in-law's 65th birthday party last month.  It took several days of planning, baking, freezing, assembling, and frosting to create a cake spectacle to feed over 50 people.  The end result was a bourbon-spiked chocolate cake with a sweet caramel icing that I should have been proud to blog about.  Instead, I felt it looked much too awkward and elementary, due to the lack of cake decoration.  So it came and went, and the internet would never hear about it.


As I was clicking my regular blog list yesterday, I came across a post with photos of five different cakes, each one looking more perfect than the last.  At least one cake was made by a professional bake shop.  I made mental notes, in the form of Pinterest pins, in the hopes that I could improve my cake decoration skills at the earliest opportunity.  A few clicks later, I found another posting one a different blog, this one about a homemade birthday cake didn't turn so well.  Yet I thought it was a very sweet and heartfelt cake, made even more so with the scattered candy pieces and crooked candles.  You could see that the cake was well loved and celebrated, even without reading the story behind it.

That's the thing about homemade, isn't it.  Homemade is genuine and honest.  It is crafted from thought, effort, and feelings, and served on a humble platter of kindness.  It is a gesture of giving a small piece of one's self for others to share.  And that's nothing to feel ashamed about.


All that being said, I'm still a little embarrassed to put up these photos of my cake, but I'm trying to get past it.  Oh, and while we're getting all these fuzzy feelings out, here's wishing you a very happy Mother's Day.  Mom: I love, respect, and appreciate you, even though I rarely ever say it.

Tuesday, March 26, 2013

Celebrating Fathers

My father is a man of few words, and a man of his word.  He doesn't wear his heart on his sleeve; he keeps it tight but gives out generous portions.  He cares for my mother without hesitation and with humour.  He is the best dad I could ask for.

He turned 67 last week.  We celebrated by making the pilgrimage to the suburbs and having lunch at his home, the house where I spent almost all of my childhood years.  My brother and his family were also in attendance, along with good cheer and sunny weather.  We ate Chinese take-out, laughed at my nieces and nephew chase each other around in circles, and chatted about this and that.  It was my kind of family day.

I made his birthday cake a tall one: a six-inch, double layer yellow cake with strawberry cream cheese frosting.  My father loves eating fruit, hence the strawberries, and despite the side effect of tinging the cake with a touch of feminine pink.  Perhaps a blush-hued cake is more appropriate for a five year-old girl, and less for a sturdy, adult man.  But it was my pink-coloured way of saying "thank you" to him: for sticking pink bandages on my scraped knee when I fell off my bike, for letting me pick the dusty rose pink colour for my bedroom, and for driving me to dozens of gymnastics classes in my pink lycra bodysuit.


Strawberry Scented Cream Cheese Frosting
Makes 2-1/2 cups.

This frosting is only lightly strawberry flavoured, and would bring a sweet pop of colour to a dark chocolate cake or a fluffy vanilla cake.  If you're a cream cheese lover, consider reducing the butter to 1/4 cup (57 g).

1 package (250 g) plain cream cheese, room temperature
1/2 cup (113 g) unsalted butter, room temperature
1/2 cup fresh or thawed strawberries, chopped
1 tbsp lemon juice, freshly squeezed
3-1/2 to 4-1/2 cups icing sugar

In a small saucepan, cook the strawberries and lemon juice over medium-low heat for a few minutes, stirring constantly until the juices start to ooze out.  Strain and measure out 2 tbsp of the juice.  Set aside to cool.

In a large bowl, cream together the cream cheese and butter until fluffy and well mixed.  Beat the reserved strawberry juice into cream cheese mixture.  Mix in the icing sugar, a cup at a time, until you achieve the desired stiffness.

Thursday, February 14, 2013

Letting Go


On the day my baby girl was born and we named her Madeleine, I knew I had to add madeleines to my regular baking repertoire.  So I started my search for a madeleine pan, the kind made of shiny tin that survives through the ages and tells a story through worn blackened spots made over time.  A very nice lady I contacted through Kijiji was willing to sell me her tin pan for a great price, even offering to deliver it to my home once she learned I was resting from giving birth a few days earlier.  I was terribly excited and waited by the phone for her call to say she was on her way over.

But that call never came.  She made up some excuse, promising to make the delivery the following week. After a few more days of radio silence, I sent her a couple of follow-up emails peppered with friendly smiley faces, for I knew there would be zero chance of scoring the pan if I raged and cussed her out for betraying my trust. Hell hath no fury for a postpartum woman scorned.  But still, she gave no response and I was forced to search for another source.

My close pal and fellow blogger was also in the market for a madeleine pan, and she turned me onto a nearby shop that sold them.  With my fingers crossed, I called the store to inquire and was sadly informed that they only sold the ubiquitous non-stick type.


A third twist of fate occurred when I learned that the Junction Flea market had an upcoming event.  At this same market a few months earlier, I had passed up a beautiful vintage madeleine pan for sale, to my continued regret.  I knew the chances of seeing it again were slim, but it was worth a shot.  My partner and I packed up the baby and spent that Sunday morning searching flea market wares in vain.

My final attempt at scoring a tin madeleine pan was thwarted still.  I was well on my way to completing an online order, only to find that the retailer wouldn't accept my payment form.  By this time, I had been through 6 long weeks of consecutive fails, and I had to admit defeat, for the repeated anticipation and let-down was too much to take.  I really wanted a tin pan, but in hindsight, this level of stubborn inflexibility seemed outright ridiculous and I was exhausted from it.  So the next day, I walked into a shop and bought a non-stick madeleine pan, and the following day I baked my first batch of madeleines.


Caring for a newborn baby brings on the same sort of ups and downs.  Before Madeleine was born, I had all sorts of ideas of how life with her would be like.  But it's been a lot more difficult than I thought, and it's hard not to be, well, hard on myself.  Yes, there are days that go smoothly, when I feel that Madeleine's needs are met when she needs them to be.  But there are bad days, where she cries for hours for unknown reasons.  Or the really bad days, when I feel like I'm making all the wrong decisions for her, and we both cry together.  I'm trying to learn to take things as it comes, listen to intuition over expert opinion, and not get too hung up when things don't go as planned.  That way, I can spend more time enjoying my little Madeleine, and also my madeleines.

Full disclosure: this was not only my first attempt at baking madeleines, but also my first time ever tasting them.  I haven't a clue how they are "supposed" to taste, but I can attest that this recipe will turn out a dozen lovely, dense cakes with a light crispness.


Madeleines
Adapted from Bouchon Bakery by Thomas Keller and Sebastien Rouxel.
Makes 12.

1/2 cup (70 g) all-purpose flour
1/4 tsp kosher salt
2 large eggs
1/4 cup (50 g) granulated sugar
4 tbsp (60 g) unsalted butter, plus additional for the pan
2 tsp light brown sugar
1 tsp honey
1/2 tsp lemon zest

In a medium bowl, mix the flour and salt, and set aside.  In a large bowl, whisk the eggs and sugar until light and fluffy, about 5 minutes.  In a small saucepan, stir the butter, brown sugar and honey over medium-high heat until the sugar is dissolved, about 1 minute.  Remove from heat.

Fold the dry ingredients into the eggs and sugar mixture until just combined.  Fold in the butter mixture and lemon zest until batter is smooth.  No need to be too perfect here; small random lumps are fine and will dissolve as the batter rests.  Cover the bowl and refrigerate overnight.

The next day, preheat oven to 350°F.  Brush the madeleine pan with melted butter, and freeze the pan for at least 5 minutes to harden the butter.  Remove the cold batter from fridge, and spoon one heaping tablespoon of batter into each scalloped mold.  Rap the pan lightly against the work surface to smooth the top of the batter and remove any large bubbles at the surface.  Bake for 8 to 9 minutes, until tops are lightly browned.  Remove from oven and unmold immediately, placing the madeleines on a rack to cool.  The cakes will keep for up to a day in a covered container.