Showing posts with label paper. Show all posts

Sunday, May 21, 2017

Another Birthday Card

 
My dear family is away for 4 days (!!!), and I have been catching up on some things, including writing here in this space.  The last few days have been filled with things that would make most people bored as hell, but for me it has been a much-needed escape from chaotic family/work life.  I am really enjoying the quiet thinking time, and getting those things-that-never-get-done done.

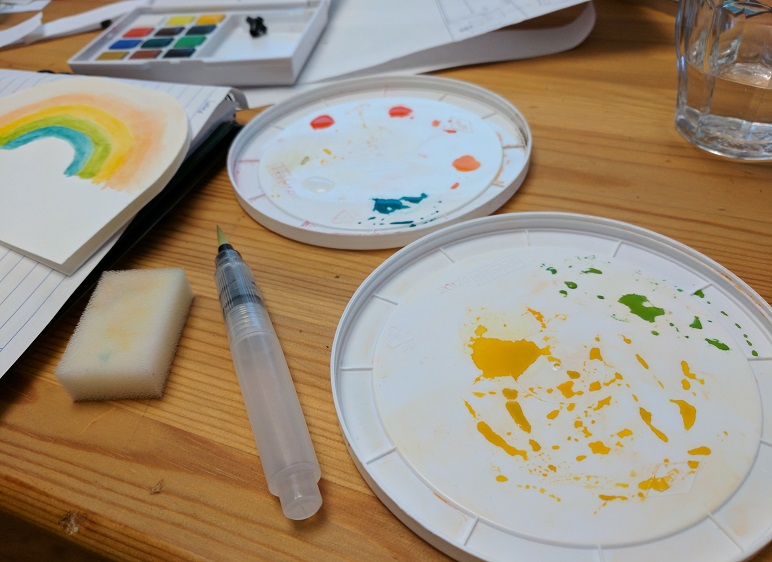
On my list of things to do was to make a birthday card.  A friend recently asked me if I have been using my watercolour paint set, which reminded me that I haven't been using it, and probably should.  I painted a couple of cards since buying the set before Christmas, but neither of them turned out well.  One of the cards was particularly rushed and messy; I put it together minutes before we had to leave for the event where the card was to be given.  This time around, I went a little slower, put some thought and planning into it, read a couple of watercolour tips online, and preblended colours to get the right hues.  I ended up with these two rainbow birthday cards; a simple and sincere design with a space to write a personalized message underneath.

Thursday, February 23, 2017

A Birthday Card

The last few birthday cards I made were schlepped together at the last minute.  To be honest, they weren't even cards.  They were gift tags, because making a tag is faster than a card.  Not exactly a proud moment in my card-making career.

For my niece's 4th birthday, I purposely set aside some time to work on her card.  Mainly because her gift was a magazine subscription which would arrive later in the mail, and so I didn't have anything to give concrete to give her at the party.  The least I could do was make a nice card.  I drew a cat head by copying one from a book, and asked my daughter to draw a party hat to go with it.  The result was a credible and spunky birthday greeting.  For the inside, I drew the message in bubble letters, and my daughter coloured them in.  She took her time to make it nice by carefully selecting brightly coloured pencil crayons and trying to colour within the lines as best she could.  We both felt happy about the way it turned out, and we agreed that we made a great card-making duo.

Monday, December 21, 2015

Getting Organized

A wall calendar with lots of notes and scribbles is the hallmark of a family home.  While I was growing up, my parents religiously used the calendar published by the Dairy Farmers of Canada.  It featured quick dinner recipes made with milk, and came free with our newspaper subscription.

Today, I use an online calendar for myself, and a paper calendar for my family.  I love having our paper wall calendar in our kitchen, because our family meal conversation always seems to center around what we're doing tomorrow/this weekend/next week/etc.

I've been searching for a long time for a good wall calendar.  I really love this one, but there's no space to write notes.  I could get one from an office supply shop, but they look so rigid and would seem out-of-place on our walls.  So I decided to make one.  Nothing fancy, just a simple and quiet calendar that can display all of our appointments and plans in one place.  Feel free to print one out for yourself!  Click on this link, and print in colour on 11x17" paper.

Wishing you all a very happy holiday season, and a joyous new year!

Tuesday, July 14, 2015

How To Thank A Crowd

My poor daughter.  This week she started in a new daycare, again.  New environment, new faces, new rules, and this time, a new language (French).  She cries every morning when I drop her off, and my heart breaks every time for her.  It is not lost on me that the decisions I make today will completely alter my children's future.  It's a frightening thought.  I hope we're doing the right thing, but it can be hard to see the bright future ahead when the tears of today are clouding our sight.

We thanked the staff and teachers from her previous daycare with a large box of salted dark chocolate chunk cookies.  Instead of making a thank you card, I wrote down our sentiments on a slip of paper, and packing-taped it along with some eye-catching graphics to a cardboard tray (leftover from an Ikea purchase).  Covering the tray with cookies leaves the recipients only one option if they want to uncover the hidden message underneath: eat lots of delicious cookies.

Parting is such sweet sorrow.  I'm going to miss those guys.

Tuesday, June 2, 2015

Sprinkles Birthday Card

My computer broke last week, so I'm writing from a mobile device.  I'll keep this one short.

Ever since I cancelled my www.craftbandit.ca URL, my readership is way down.  Way down to zero.  I'm not sure who reads this blog, but I miss you!  But if you're reading this, then hey, welcome to thecraftbandit.blogspot.com!  Luckily life outside blogging is still thriving, and currently we seem to be amidst kids' birthday party season.  I made this sprinkles birthday card using bits of paper scraps.  Hopefully the 6-year old recipient appreciates the handmade quality of the card, but somehow I doubt it.

Wednesday, January 7, 2015

Yay Baby! Folding Card

Hello, 2015.  My new baby should be entering the world in a few short weeks, but also I know of some other new babies to come (and also some that have just recently been born).  How fortunate we live in such exciting times!  Before this new baby turns my life inside-out, I made a few of these folding cards to keep on-hand and dole out to proud parents when their time comes.

Yay Baby! Folding Card

This card folds into 6 panels, so really you can put on any message you like that will fit.  If you don't trust your skills at cutting out paper letters, you can trace and cut circles that fit inside the panel, and draw one letter per circle in block-type with a black marker.

What you'll need to make 3 small folding cards:

- 3 mini-sized blank envelopes (2-1/4" x 3-1/2")
- 1 piece of card stock (8-1/2" x 11") - I used an off-white coloured card stock with confetti pieces
- 1 or more scraps of coloured paper - I used 5 colours: one for "yay" and "!", and the other 4 for each letter in "baby"
- scissors
- glue
- x-acto knife
- ruler (at least 11" long)
- cutting mat
- pencil and eraser - only if you need to draw an outline of your letters before cutting

Measure and cut the card stock into 3 long equal strips (approx 2-7/8" tall), using the x-acto knife, ruler and cutting mat.  Fold each strip in half, and measure/fold each half into thirds, accordian style.  Each panel should be about 1-13/16" wide, and there will be 6 panels in total.

Measure and cut the scraps of coloured paper into rectangles: 1" x 1/2" for the 3 small letters ("yay"), and 1-7/8" x 1-3/8" for the 5 large letters ("baby!").  Now is the tricky part: using scissors, cut each rectangle into its letter.  I can usually do it free-hand, but you can use a pencil to draw in the outline of the letter before you cut.  If you do, make sure you gently erase the pencil marks after cutting.

Affix each letter with glue to their panels.  When you're ready, you can write a personalized message on the back of the 1st and 6th panels, which, when the card is folded, become the front and back covers.  Slip your card into its envelope, seal, and deliver to the overwhelmed but happy parent of new baby.

Thursday, October 16, 2014

Animal Magnet Puzzles

Let's talk homemade toys.  I recently made my almost 2-year old a set of animal magnet puzzles.  She loves animals, magnets and puzzles, and thanks to free online printables and my local dollar store, her animal-magnet-puzzle dreams came true without too much effort or cost on my part.  The hard part was choosing which printable to use.  I waffled between these dressed-up animals and these matryoshka dolls, but ended up being drawn in by the colourful, simple illustrated animals from these Mr. Printables bookplates.

Animal Magnet Puzzles

What you'll need:

- 250% enlarged colour print-out of Mr. Printables bookplates (I chose cat, rabbit, crocodile and monkey)
- 4 craft foam adhesive sheets
- 1 large piece of magnet (I used a dry-erase calendar purchased from the dollar store)
- scissors
- mod podge (1st choice), or craft glue (2nd choice), or glue stick
- paint brush, if using mod podge or craft glue

Cut out each print-out character.  If there are areas that are skinny (e.g. long tails or ears), consider cutting no closer than 1/4" around the character, to ensure that your cut-out can endure rough child handling (i.e. less prone to ripping, etc).  I used a 1/4" space around each character, as I liked the extra pop of colour that came with the outline.

Using the character cut-out as a guide, roughly cut a rectangular piece from a foam sheet larger than your character, with the non-adhesive side touching the non-printed side of the character.  Remove the adhesive backing from the foam cut-out, and firmly adhere to one of the corners of the magnetic sheet.  Cut the magnet to match the rectangle.  You should now have a rectangular piece of foam that is magnetic on one side.  Repeat for each character.

Loosely glue the characters onto their matching foam piece using mod podge or glue.  Cut the foam-magnet to match the shape of the character, leaving a space of foam at least 1/4" around the character.  Select a good halfway point where to snip the character in half (creating 2 puzzle pieces).  Separate the paper character from the foam, and make a wavy cut in the paper at the halfway point.  Note that the paper is cut separately to ensure a sharp edge.  Re-glue one half of the paper back onto the foam, and cut the foam with the same wavy cut using the paper as a guide.  Re-glue the other half of the paper onto its foam.  Repeat for each character.

You now have your magnet puzzles made, but I would recommend the following additional steps to be certain the paper is glued down well.  Double-check your gluing to ensure all edges are well-glued; if not, add more glue and press down.  Place all magnets on a flat surface, and apply a heavy flat weight on top for at least 30 mins to ensure a good bond.  Remove weight, and brush on a thin coat of mod podge or craft glue to the foam/paper side, to act as a light sealant.  Leave to dry for at least an hour.

Thursday, December 19, 2013

Last Minute Holiday Cookie Package

'Tis the season to be baking, my friends.  Have you been keeping your oven warm and your loved ones off their diet?  As for me, oh sure, I had visions of snowflake-shaped speculoos, chocolate florentines, and pistachio nougats dancing in my head.  But with less than a week until Christmas and not a cup of butter creamed, not a chocolate block chopped, nor icing piped, I needed to get real.  Fast.

I ended up making shortbread cookies.  I remembered a recipe off the top of my head: 1 part icing sugar, 2 parts butter, 3 parts pastry flour.  Ive made this recipe nearly a half dozen times.  I'm always slightly disappointed in how it turns out, but that part I always seem to forget.  Sigh.


I still gave these not-so-stellar cookies the full gifting treatment, packing them pretty in brown paper coffee bags.  These ingenious bags are quite sturdy and lined with plastic, perfect for carrying and storing cookies.  And hey, if you're slick, they are freely available in the grind-your-own coffee beans section of the grocery store.  Tie on a generous-sized ribbon with a gift tag, and ahoy!  These lovely package of homemade sweets are ready for giving.

Wishing you all a festive holiday season!  See you in 2014!

Tuesday, November 5, 2013

DIY or Die, and a First Birthday Card

I'm not sure when exactly it happened.  I used to be a normal, functional human being; one that would slap store-bought sauce, cheese and vegetables atop a round of pita bread, pop it in the oven and call it homemade pizza.  And hey, from what I remember, those pizzas were not only quick to make, but also pretty tasty little fellas.

Then I discovered pre-made pizza dough.  All I had to do was punch it down, roll it out, and the rest I already knew.  And hey, this kind of pizza was more like a pizza, and it only took a few more steps.  Insert a slightly more inflated sense of self.  But wait, what's this?  A simple, one-bowl pizza dough that only takes a couple of hours to rise?  This is a homemade pizza to be proud of.  Whoa... hold on, this 18-hour pizza dough is really light and chewy.  Well worth the time and advance planning.  Gotta make the sauce from scratch too, naturally.  Oh man this pizza is so good.  I'll never buy another pre-made pizza again.

So what's the problem, exactly?  Well, it's not just pizza.  I started making other things from scratch.  And then I started making many things from scratch: yogurt, preserves, party decorations, granola, fresh juice, knitted socks, greeting cards, baby food, my wedding dress, and most recently, 4 dozen ladybug-themed red velvet cupcakes for my friend's kid's one-year birthday.  And when I'm not making something from scratch, I'm THINKING about what I can make from scratch.  I read restaurant menus to brainstorm make-at-home meal ideas.  Scrolling through my Pinterest feed makes me feel inspired to create, but also stressed and anxious.  The worst symptom of all is when I want to buy something at the store but decide not to, because "I can make it myself, but better and cheaper".  DIY is paralyzing my life.

Don't get me wrong.  I still very much enjoy the slow process of turning raw materials into a finished product.  And that euphoric sense of achievement when I've finished it is one reason I keep coming back for more.  But when buying a ready-made pizza for dinner makes me feel like I'm somehow shortchanging my loved ones, I wonder if my desire to craft and create is crossing into unhealthy territory.


First Birthday Card

This card was wholly inspired by The Indigo Bunting's collection of paperless cards.  Colourful and simple, they capture the essence of what a child's birthday celebration is all about.  This easy paper version can be put together in less than an hour, and the card is customized with the birthday kid's name written on the front.

What you'll need:

- 1 blank card and envelope (4" x 6")
- a set of pencil crayons
- 2 scraps of paper: 1 for the talk bubbles (light yellow), 1 for the number one (purple)
- scissors
- ruler
- pencil
- eraser
- fine-tipped black marker
- craft glue

Roughly pencil draw your talk bubbles and number "1" on their respective coloured scrap paper pieces.  Use a ruler with the number "1" to ensure a straight edge.  Lightly pencil in the words into the talk bubbles, and the smiley face into the number "1".  When you're satisfied with how it all looks, cut them out.  Use the black marker to finalize the words and face.  Wait a few minutes for the ink to dry, and gently remove all pencil lines with an eraser.  Glue talk bubbles and "1" onto the front of the blank card.

To draw the confetti, select 5 or 6 pencil crayons of various rainbow colours.  Starting with one colour, add short lines of various length scattered evenly on the front of the card.  Repeat with each of the other colours.

Wednesday, July 31, 2013

Elephant Baby Shower Card, and A Baby List


I know I said that this isn't a baby blog.  It still isn't.  But gee, right now it seems like everyone in the world is pregnant, no?  And I'm dying to talk about it!  There are at least four women in my life who are expecting. (Congratulations, ladies!)  Which means lots of baby showers, baby talk, baby advice, and baby baby babies to come.

In fact, I went to a baby shower a few days ago.  I made a note of it in my calendar quite some time ago, but man, do these things creep up on you.  I could have sworn that I still had many, many weeks to pick out a thoughtful gift and write out some heartfelt sentiments.  At least I was able to make a sweet little card just in time, with scraps of card stock I had lying around.  If you scroll way down to the bottom of this lengthy post, you will find instructions on how to make the card yourself if you so please.

Thinking back to my own pregnant days makes me sentimental and weepy.  All of the uncertainty and excitement; so much to think about, so much to do.  It's overwhelming and emotional, and you wonder how you're going to get it all together in time, and know what to do when it's time.

But then it happens, and then you do.  You know exactly what to do.  Or you figure it out.  And you keep on figuring it out, as your baby learns and figures stuff out too and starts onto new and surprising things.  And you try to enjoy every moment and not worry too much.

To try to keep things as uncomplicated as possible, I tried very hard not to collect too many baby things.  At the same time, to keep things uncomplicated, you do need a few key items to make life easier.  Striking that balance can be tricky.  So before my due date, I did some online research and consulted lists of essential baby items to organize ourselves before gathering up what we needed.  None of those lists were very useful to me, as they seemed to be geared to new parents with lots of storage space and/or cash.  We ended up accepting lots of hand-me-downs (thanks, you guys!), though we did buy a few things before our baby was due.  Looking back, I'm pretty happy with what we bought and didn't buy, though there are a few things I really wish I knew about.  So one late night about two weeks ago, I wrote up my own list of essential baby items for people like us.

What exactly is "people like us"?  My partner and I live in a one-bedroom apartment in the city.  Up until 3 months ago, we were living off of one moderate income for over a year.  Our sweet baby girl was born in December, at the start of winter.  She slept in our bed for 3-1/2 months, and was exclusively breastfed for just over 5 months.  She loves eating and doesn't care if her diaper is wet.  When she is awake, her limbs appear as a blur of motion, which may explain why she needs to eat so much.  We don't own a car, and get around primarily by walking and public transit.

If you're on a tight budget, I would strongly recommend checking Craigslist, Kijiji, second-hand shops, yard sales, and clothing swaps first for any baby gear you need.  Preloved baby stuff is often well-priced and still in great condition.  I know this because we bought almost everything second-hand.  Even second-hand CLOTH DIAPERS.  That's right: my baby's bare bum touches the old whispers of poo from other babies.  Because of it, we've saved hundreds of dollars and dozens of trips to the store.  A tip if you're buying baby gear from Craigslist and Kijiji: do it before your baby arrives, as most sellers tend to have babies and/or kids already and can't really go out too far to meet you.  Usually it's pick-up only, which is easier to do without a newborn in tow.

If you live in Toronto, Baby On The Hip has a clothing swap every few months, where you can take away as many items as you want, for the cost of admission ($5-10).  Bumbleberry Kids is my favourite second-hand kids shop in the city; they have a great selection of lightly used clothes, toys, and baby items for cheap.  If you prefer online shopping, browse Merrily Merrily's website, pay using PayPal and pick-up in person.

And now, here is my list of essential baby items for the first 4 months:

Clothing:

Onesies (x4-6).  Until your baby starts eating solid food, you may find that he/she doesn't need to change clothes for a few days, unless you get a diaper blow-out or a really bad spit-up (both pretty rare).  A small handful of onesies will do just fine, especially if you're planning on doing a lot of skin-on-skin bonding in which case your baby will usually be almost naked.  For newborns, the best onesies wrap around and snap/tie in front, to avoid pulling the shirt over their head (which makes them cry).  For all babies, the best onesies have longer legs that look like little shorts, so you can take your baby outside wearing only a onesie and he/she won't look like he/she is only wearing underwear.

Footed sleepers (x2-3).  Try to get the ones that open up all the way, and not just at the bottom.  The zip-up kind will save you from the challenge of matching a long line of snap buttons on a wiggly baby during a bleary-eyed night.

Hat (x2).  If the inside of your home is cold, it might be nice for your baby to wear a light hat indoors.  If it's winter time, you'll want a warmer hat for outdoors, preferably with ear covers.  If it's summer, choose a hat with a wide brim.  Hats worn for warmth should be nice and stretchy, to make it easier to pull over that delicate and squishy baby head.

Socks (x2).  Baby socks have a tendency to twist and fall off.  If you can find the ones that pull up mid-calf or higher, you can tuck them into pant legs to secure them better.

Shirts and pants (x1-2).  Baby shirts are the worst.  They always ride up, either through normal baby shifting or because the baby is eating their shirt.  Though you may want a shirt or two to dress the baby up to go see people.

Pants (x2-3).  Pants are good for pairing with onesies.  The best pants by far are leggings, because they pull on very easily.  Footed pants are also great to cover up little baby feet.

Jacket / Snow suit (x1).  If you have a stroller/car seat bunting bag, you could get away with a light jacket, or even none at all.

Nice to have: sleepsack (which acts like a wearable blanket), swim wear (if you're planning on going swimming), hair accessory (if you get offended when people mistake your girl for a boy).
Don't bother with: long sleeping gowns (like shirts, these tend to shift and ride up), booties (cute but unneccessary and often fall off).

Sleeping:

Crib and crib mattress.

Crib sheets (x2).  A young baby isn't likely to dirty their sheets often.  Crib mattress protector optional.

Swaddle blankets (x3-4).  The debate is out on whether or not swaddling is good or bad for newborns.  Even if you think swaddling is a bad idea, having swaddling blankets on-hand is still a good idea.  The best, by far, are the large cotton mueslin ones.  Light, breathable and soft, these blankets are ultra functional: as a stroller sun cover, burp cloth, change mat, regular blanket, or nursing cover.  Though expensive, the Aden + Anais blankets are well worth the price.

Nice to have: bassinet, crib mobile (get crafty and make yer own!), swing (not all babies like swings, so try to score a hand-me-down).

Transportation:

Stroller.  This was the most expensive baby item we bought, as we needed something that would be suitable from birth, could push through snow and light terrain, lightweight (for carrying onto public transit), narrow (for navigating through shops and streets), and with a large accessible basket (for loading up with groceries).  We bought an Uppababy Cruz on Craigslist and overall are quite happy with it.

Stroller bunting bag.  We don't have one of these, and I wished that we did.  Consider this: for those winter months, you have to bundle-up your baby to go out.  But when you arrive at your destination, it's in a heated building and you KNOW your baby is overheating inside her hat-snowsuit-sweater-onsie combo.  So you carefully unzip the snowsuit and try to remove layers gently, but all the poking and picking wakes her up and she is super pissed.  A bunting bag would have make this so much easier, as the unzipping is less likely to cause a stir.  A second-hand JJ Cole Bundle Me sells for about $25.

Car seat.  Required by law when you take your newborn baby home from the hospital.  Ours is a hand-me-down, and it does the job on the rare occassion when we need to use it.

Car seat adaptor for stroller.  We don't have one of these, but I could see how it would be very useful if you own a car.  One of our friends used the car seat as the ONLY seat for the stroller, which I thought was quite brilliant if you don't intend on taking long stroller walks.

Baby carrier.  An absolute essential.  All babies love to be carried, and with a carrier you'll be able to hold your baby close without straining your back/neck/arms/wrists.  I loved the idea of a baby wrap or sling, but in reality I rarely used ours, as I found it very awkward.  Instead, I would recommend a backpack-style carrier, such as BabyBjorn or Snugli.  If you invest a carrier that has a good waist strap, such as the Ergobaby, you'll be able to carry your baby from infancy well into his/her later years.

Feeding:

Breastfeeding pillow.  Not an absolute must, but it will be extremely helpful, especially in the early days/weeks when breastfeeding is new and challenging.  I hear good things about My Brest Friend.

Bottles and nipples.  I hear that babies can be quite particular with which type of nipples they prefer.  We bought one Nuk brand wide-mouth bottle with a slow-flow orthodontic nipple that our baby seems to like just fine.  She is bottle fed only a couple times a month, only if I'm away from her or if we are eating at a restaurant.  If I could go back in time, I might try cup feeding before bottle feeding, which would eliminate the need for bottles entirely.

Milk storage bottles (x4-6).  You could probably get away with using Mason jars to store milk in the fridge or freezer, but you will need the special bottles if you have a pump.

Tablet computer, books, and movies.  Yes, I know they say that you're not supposed to multi-task while nursing, but COME ON.  My newborn nursed for up to 90 minutes each session, 8 times a day.
My picks: Bringing Up Bebe and Baby Meets World were my favourite light-hearted baby-related books.  They both helped me take a step back and realize that there are many ways to raise a healthy and happy baby. Babies is an adorable documentary about four babies from different parts of the world.  This movie has little in the way of dialog, so you can watch it any time of day.  Oh Joy, Orangette, and Cup Of Jo are seasoned bloggers that are generous with their baby stories, photos, and ideas.

Nursing wear (x2-3).  I tried not to buy any nursing wear in the beginning, as I felt like I could just use a cover and be done with it.  The first time I nursed in public it was on a packed shuttle bus to the farmer's market in March.  I was wearing about 3 layers and a scarf, and my baby was wearing about the same.  It was a real struggle, pulling all those layers up/down while holding a crying baby.  I now use nursing tanks and bras and forgo the cover, and both me and my baby are much happier.  The Bravado Silk Seamless nursing bra is my favourite; I scored a free one through their test wearer program.

Nice to have: breast pump, breastfeeding cover.
Don't bother with: buying formula prior to your due date if you're planning on breastfeeding, as it will be too tempting to make the switch in the first week or two when breastfeeding is most challenging.  Also, sterlizers, bottle warmers, bottle brushes and drying racks are not necessary unless you're planning on bottle feeding every day.

Washing and Changing:

Change mat/blanket (x3).  One for your home, one for the diaper bag, and one clean back-up.

Diapers.  We bought a second-hand Bummis infant cloth diaper kit, and used it for baby's first 5 months.  Washing cloth diapers is a lot of work; expect to do a load of diapers every second day.  But it saved us from making trips to the store to buy disposable diapers.  The disposable liners are useful for the first week for those sticky newborn poos.

Diaper wipes.  We cut up about three dozen 6" flannel squares, and use them with a squeeze bottle of water in place of using prepackaged diaper wipes at home.  It was easy enough to add these wipes to the wash on top of the cloth diapers.

Bum ointment.  We used olive oil every few diaper changes in the first few weeks only.  I made a lavender-calendula salve using infused olive oil and beeswax, but our baby hardly needs it.

Diaper bag.  Any large bag will do, but a padded strap, and a couple of compartments and pockets will make a huge difference.  Ours is a vintage carry-on luggage bag with a shoulder strap that fits nicely around the stroller handlebar.

Diaper pail.  I've heard some new moms complain about their babies having very smelly poo, but I can't relate.  Our diaper pail is a plastic bucket from Ikea.  It sits next to our bed, with the lid off to the side.  Maybe our whole apartment smells like baby poo and we've grown accustomed to it, and everyone who comes over to visit is being very polite.

Washcloth (x2-3).  For use in the bath.  Later when your baby starts eating solid foods, you may need more washcloths for wiping his/her face, hands, chair, legs, wall, your hands, and more.

Towel (x1-2).  Hooded towels are cute and provide extra head warmth in the colder months.

Nice to have: change table or change table top, change pad, change pad covers, baby bathtub (in place of taking baby into tub with you).
Don't bother with: baby wash (just use water).

Toys:

Activity gym.  Our baby started to use this when she was about 3 months old, and I loved having those 15 minutes to wash dishes, fold laundry, stretch, relax, eat, or whatever.  These gyms are also good for tummy time, and for developing hand-eye coordination as they bat at the dangling objects.

Small stuffed toys/rattles (x3).  These toys are a dime a dozen.  Some rattle, some squeak, some crinkle, and some will do all three.  Toys that have a little loop for great for hanging from activity gyms, strollers, high chairs and car seats.  Stash one or two toys in your diaper bag for those moments when you're in public and your baby starts to get fussy.

Board books (x2-3).  To keep your baby engaged, be sure to choose age appropriate books.  For very young babies, pick high contrast colours with simple rhyming verses.  You don't really need to buy books if you have a good library nearby.

Other:

Dresser, baskets, shelves, and/or trunk to store clothes, linens and toys.  A little bit of organization will help you keep your sanity.

Large flannel squares (x4-6).  Great for burping, wiping drool or spit-up, or in-a-pinch blanket.

Thermometer. Digital read thermometers make temperature-taking easier.

Music.  When feeding, rocking, changing and burping didn't settle our crying baby, singing along to music always did.  She seemed to have a preference for The Beatles, Bob Dylan, Bill Withers, and Tom Waits.

Home cooked frozen meals.  We spent one weekend making 6 large trays of vegetarian moussaka and ziti, which we kept in the freezer for those days when we needed to eat but were too tired to cook or go out.

Help from loved ones.  This might sound obvious, but it's not.  The first and second postpartum months will feel very isolating.  Remember that you are not alone; many before you have felt the same way.  Your family and friends want very much to help you.  Sometimes you just need to ask.

Daycare waiting list spots.  If you live in Toronto, you will need to get on these before your baby is due.  Don't forget to get in-line for the Child Care Fee Subsidy too.

Nice to have: nail clipper (you can bite the nails shorter, but clippers are easier).


Elephant Baby Shower Card

What you'll need:

- 1 blank card and envelope (4" x 6")
- 2 scraps of paper (at least 2.5" x 2.5" each): 1 for the elephant (grey), 1 for the toy train (light green)
- 1 piece of paper, preferably card stock, to print out the template
- scissors
- ruler
- pencil
- fine-tipped black marker
- craft glue

Print out this elephant template onto a piece of paper.  Cut out the elephant, and use this as a stencil to trace out the elephant shape with your pencil onto your grey scrap paper.  Cut out this elephant, and use the marker to draw its eye.  Carefully remove any pencil markings with the eraser.


Roughly position the elephant on your card.  Pencil in the word 'baby' next to the elephant, in spaced out block letters.  Once you're happy with the placement and look of your letters, go over it with a black marker.  If hand lettering isn't your thing, you could type 'baby' on your computer, print, cut out, and paste it to the card.

Measure and cut out a thin strip of your other scrap paper.  It should be the same length as the word 'baby'.  Cut the strip into 4 equal pieces, to form 4 train cars.  Before gluing the cars to the card, draw the wheels and pull string with the marker.  Glue the cars and elephant in place.

Saturday, June 29, 2013

Bunting Cake Decoration


Happy Pride Week!  Summer is for celebrations.  Here's a quick tutorial that will walk you through making an easy flag bunting cake decoration using supplies you have on-hand.  If you don't have any sticky note paper, you could use regular paper and a glue stick to achieve the same effect.


Mini Flag Bunting Cake Topper

What you'll need to make 2 lines of flag bunting:

- a few sticky notes
- at least 12" of string
- 2 bamboo skewers (or 4 toothpicks, in a pinch)
- scissors
- fine-tipped marker

Cut one skewer into 2 pieces by eyeballing the middle point of the skewer, and making a cut about 1/2" to the left or right of the middle.  Do the same for the second skewer.

Next, measure the width of the cake where the bunting will hang, and add 3 inches.  Cut 2 pieces of string to this length, and tie each end to the ends of your skewer pieces.  You should now have two sets of two equal length "poles" tied together by a string.

Peel off one sticky note, and fold the top onto itself so that the sticky part is inside the fold.  The fold is best placed just under the sticky part; in other words, the fold area itself is not sticky.  Cut your flag shapes, and draw your letters using the marker.

Lay down your tied skewers on a flat surface so that the strings lay flat and straight.  Affix the flags by unfolding and refolding over the strings, and centering the flags between the skewers evenly.  No need to be too perfect; you can move the flags around carefully even after the skewers have been poked into the cake.

Once the flags are secured onto the strings, stab the skewers into the cake, with the longer pair behind the shorter pair so that both sets of flag letters can be seen.

Sunday, December 23, 2012

Last-Minute Holiday Decorations


Oh, the holidays.  What other time of the year do we all feel more gleeful, thankful, burned out and busy, all at once?  It's also a special time when even non-crafty folks get a-craftin', with their holiday baking, card making and gift wrapping.

DIY decorations is where it all starts.  As a kid, we all made decorations at home or in school, whether it was a paper-cut snowflake, or a greeting card for grandma.  But who says you can't make your own decorations as an adult?  With a little time, supplies and creativity, you can easily make your space colourful and festive-ready.


I love these simple ornaments made from a corrugated cardboard box and black marker.  I made some of my own and strung them up on a bouquet of birch branches.  Feel free to print out this template to help you along with your own cardboard ornaments.

If you prefer something a little less childish and two-dimensional, here's a short list of my favourite online tutorials that will show you how to make ornaments and garlands you'll be happy to wrap around everything.

Tissue Paper Tassel garland -- The Sweetest Occasion
Yarn Pom Pom garland -- Design Sponge
Felt Twisty ornaments -- Purl Bee
Fabric Flag Bunting garland -- Christie Chase (fast way), Pink Suede Shoe

Enjoy the festive season....... see you all in the new year!

Tuesday, December 18, 2012

Baby Mobile Make Party


Baby showers are really not my thing.  Or gift showers, really.  I find them really awkward, like participating in a public display of a private moment.  There's usually an obscene amount of gifts, which is the first sign that something isn't right.  Then there's the gift-opening, where everyone gathers in a circle and watches the honoured guest opens them one-by-one, doing her best to express sincere and equal gratitude after each.

But I did have a number of baby shower offers, which I really do appreciate as a kind gesture.  Instead, I thought it would be nicer to have an afternoon make-party in my apartment with 4 of my closest crafty pals and a few snacks.


The project was a Paper Bird House baby mobile, an idea inspired by a visit to Copenhagen last year.  Within Copenhagen, there is a famous bohemian and artsy squatter's community called Christiania.  We spent a couple of days and nights in the area, and I distinctly remember a large tree covered with a hundred tiny and colourful wooden bird houses.

To make the small houses, we used an on-line template, which I printed out slightly larger on legal-sized paper.  The template was cut out, and traced onto card stock.  Various paper punches and free-hand shapes were glued on or cut out, and the card stock was scored lightly at fold lines to be bent and glued into shape.

Each of my pals ended up making 2 houses each, resulting in 10 little lemony-mint coloured bird houses, each one more unique than the next.  Found birch branches formed the frame, with 5 houses dangling at different lengths from scrap yarn on each mobile.  It is truly one of the sweetest baby gifts ever... I wouldn't trade it for a mountain of store-bought presents.  Thank you, ladies!

Sunday, September 30, 2012

Paper Cut Card for Love Birds

I came up with the name for this blog, Craft Bandit, sort of by accident.  I was sitting on the bus, on my way to work, looking out the window and daydreaming as usual.  A friend suggested that I join her in an upcoming 10 km race by "running bandit", meaning to join an organized race without paying.  I have played race bandit in the past, for the purposes of joining a large pumped-up group of runners on a pre-mapped out course, and I was pondering the ethical debate of doing so on this particular bus ride.  It got me thinking about creative work, and how some artists hold their designs and techniques very tightly to their chest.  Perhaps they hope that by doing so, their products will remain unique and the demand for them high.

All too often do we stress the importance of profiting from selling crafts, and too little on the importance of the crafting movement.  Helping people understand how your crafts are made only enhances their appreciation of the craft.  If your product is a good one, of solid design and quality workmanship, more people will still opt to buy than try to copy.

The crafting community relies on the support of each other.  Every talented crafter has achieved success and recognition through the help of the talented others before them.  I like to think that the name Craft Bandit suggests borrowing and sharing ideas and techniques with ethics and respect, but without explicit permission.  For any project that I make and post on this site, I will provide the guidance you need to make your own.  I will admit that I'm incredibly lazy about posting instructions, so if I've not made it obvious, please post a comment with your email address and I will be sure to contact you.


All that said, I am happy to announce my first tutorial!  It's a super-simple, paper cut greeting card.  Because who doesn't love receiving a handmade card?  Best of all, making your own card often costs less than buying a pre-made card, which isn't always the case when you make your own, considering cheap overseas labour and rock bottom-priced mass manufactured goods.

In September, I attended three weddings, and thus was in need of three wedding cards.  So I popped into my local paper store to get some ideas and supplies.  The idea came from a pack of Japanese gift tags that had a design of painted black sillouette birds behind white birds.


Paper Cut Love Birds wedding card

What you'll need to make 1 or 2 cards (4.25" x 5.5" each):

- 4 sheets of paper (8.5" x 11" each): 1 card stock, 1 white/pale colour, 1 bright colour, 1 white
- 2 envelopes (4.5" x 5.75" each)
- paper cutter OR x-acto knife and ruler OR rotary cutter and ruler (optional)
- scissors
- pencil
- fine-tipped black marker
- glue stick

Using your paper cutter / x-acto knife / rotary cutter / scissors, cut all 4 sheets of paper in half, width-wise.  This will leave you with 8 sheets of paper, measuring 8.5" x 5.5" each.  Fold the card stock in half.  This forms main body of the card.

Lightly trace out a line of birds on the white/pale paper with a pencil.  Feel free to print out this helpful bird template.  Cut your birds out with scissors, trying to keep a smooth line by making long, continuous cuts.  The side with the pencil marks will be glued down, so no need to erase the marks.  Apply eye dots to each bird with a black marker.

Similarily, lightly trace out the two main birds on the bright paper with a pencil, and cut out with scissors.  Draw small hearts for eyes with black marker.  Glue the line of birds down first onto the card stock, and then layer the two birds glued on top.

For the inside sheet for your hand-written greeting, cut the remaining white paper into a 7.75" x 4.75" size.  Fold in half, and write your message on the inside right-hand half.  Glue only the back of this half, and paste into the inside of the card.  Your first card is complete!  If you want to make a second card, repeat all instructions above a second time.