Showing posts with label cooking. Show all posts

Tuesday, May 3, 2016

Food for Thought

The subject of children and their eating habits is a touchy one.  Each of us seem to have our own opinions on how best to provide a robust food education to our children.  What we can agree on is that our early year experiences sets us on the course of who we end up as later in life, so modelling a healthy relationship with food from the beginning is something that shouldn't be taken too lightly.

Our family's food philosophy has evolved over time, through research, trial-and-error, and advice from other parents.  Compared to other families, we put less importance on what the children eat, and more importance on the pleasure and social culture of eating.  It goes something like this:
  1. Eating is a shared, communal experience.
    We eat together, as a family.  Eating happens at the table, not in a car, stroller, or while running around.  The only company we keep is each other; no toys, TV, or phones during mealtime.  Everyone eats the same food, and only what's offered at that meal.
  2. Snacking is reserved for social events, and only when other children are also snacking (e.g. birthday parties, play dates).
    The kids get 2-3 snacks a day at daycare.  But when they are with us, we don't provide any snacks, as it often ruins mealtime appetites.  If the kids are truly hungry between meals, they can have a glass of milk, and a reminder to eat when food is available, which is only at mealtimes.
  3. Food is never to be used as a reward or punishment.
    Nobody is coerced into eating anything, but everyone is encouraged to try new foods or things they claim not to like.
  4. Food should be treated with respect.
    No playing with food.  No throwing food.  No "hiding" vegetables in sauces or smoothies.  All foods should be appreciated for what they are, and if the child isn't interested in trying it, we'll just offer it again another time.
Our kids are still kids.  They would rather have cookies over a bowl of soup any day.  Sometimes they only get in a couple of bites before wanting to run off and play.  Other times there are tears because vegetables are mixed right into the pasta, or the food is too hot.  But they also love picking clams our of their shells, munching on leafy greens right off the plant, and going to town on a bone-in chicken leg.  The girls act silly and there are lots of giggles, and we chat about our how our day went and upcoming weekend plans.  And when mealtime is over and the clean-up is done, there's always another meal to look forward to only a few hours away.


Grilled Spinach and Cheese Sandwiches
Makes 4 sandwiches.

These little sandwiches are quick to make, especially if you prepare the filling in advance and keep it in the fridge until you're ready to assemble your sandwiches.

1 bunch of spinach, trimmed and washed
1 tsp olive oil
1 tbsp onion, minced
1 clove garlic, minced
50 g (1/4 package) cream cheese
A pinch of nutmeg
Salt and pepper, to taste
8 slices of bread
4 slices of Emmentaler Swiss cheese
Softened butter or mayonnaise

Blanch spinach by immersing in boiling water for 30 seconds.  Drain and rinse with cold water to stop the cooking process.  Squeeze the spinach with your hands to remove as much water as you can, and roughly chop into small pieces.

Heat the olive oil on a skillet on medium heat.  Add onion and garlic, and cook until the onion softens, about 2-3 minutes.  Add cream cheese, and mix until the cream cheese melts and there are no large lumps.  Stir in spinach, nutmeg, salt, and pepper, and scoop into a bowl.  Clean out the skillet in preparation for sandwich grilling.

Assembling the sandwiches: lay down a slice of bread.  Spread a thick layer of spinach-cream cheese, and cover with a slice of swiss cheese.  Sandwich with another slice of bread.  Repeat with the remaining 6 slices of bread, to make 4 sandwiches altogether.

Cooking the sandwich: heat the skillet on medium heat.  While it is heating up, spread butter or mayonnaise (my preference) on both sides of the sandwich.  Place on the skillet and heat until golden brown and crisp, about 2 minutes.  Carefully flip the sandwich, and brown the other side the same way.  Remove from heat, and repeat with the remaining sandwiches.  Slice into quarters, and serve warm.

Friday, October 16, 2015

An Everyday Salad

The past harvest season for our small backyard vegetable garden was our first, and much more plentiful than I expected.  We had a steady supply of tomatoes and herbs for most of the summer, and a few bumper crops of lettuce and arugula.  And parsley.  Way too much parsley.

I'm not one to let all this parsley go to waste, so I turned to my trusty Ottolenghi cookbook and find an herb salad recipe, described as "astonishingly fresh" and "one of the most gratifying dishes you can possibly make".  I'd like to add that eating an herb salad is much like consuming the sun's energy directly through your mouth.  Good for you, and good to eat: I liked it so much that I started to eat it as a meal on its own, and then I tweaked it here and there to make it easier to prepare.  No measuring, no chopping.  Just a series of coordinated, quick movements around the kitchen, and you'll be treating your body to a glorious parsley salad in no time.

Parsley Salad with Toasted Sunflower Seeds and Currants
Makes 1 large meal-sized salad.

Consider having this salad with an open-faced tomato sandwich, when tomatoes are in season.  Or, consider wiping up the browned butter left in your skillet with a big chunk of crusty, chewy bread.

1 large handful of flat-leaf parsley
2 tbsp unsalted butter
1/4 cup unsalted, raw, hulled sunflower seeds
2 generous pinches of sea salt, divided
juice of 1/2 small lemon
a generous drizzle of extra-virgin olive oil
1/4 cup dried currants

Wash parsley well, and shake off excess water.  Pick off leaves and place into a large mixing bowl.

Heat the butter over medium heat in a frying pan, until it melts and starts to bubble.  Add sunflower seeds and a pinch of salt, and stir constantly until the seeds are golden brown, about 2 minutes.  They will burn quickly if unwatched.  Pour seeds and hot butter on top of parsley leaves.  Add lemon juice, olive oil, another pinch of salt, and currants.  Toss gently, and serve.

Tuesday, September 15, 2015

Stalks and Soba

Earlier this year, my partner worked for an organic produce company.  One of the perks was that he could take home the unsellable fruits and vegetables which would have otherwise gone into the trash.  Sure, the free produce was wilted or had holes, bruises, or bugs, but we loved the food nonetheless, and we would generously cut off the bad parts and happily eat the rest.  We were armchair freegans, and proud of it.

Since he changed jobs, we're back to buying produce again.  Our fridge is now stocked with only a few choice fruits and vegetables, and I have been trying to keep up the freegan spirit by eating every edible part of the select produce that we do buy.  For example, I started to save up kale and chard stalks by cutting them into matchsticks and stashing them in the fridge for future meals.  Cleaned and cut stalks can be stored for over a week in this way; over time they do dry a bit and bend into funny little curls though.

My favourite vegetable stalk recipe is spicy peanut soba noodles (using this Food52 recipe).  It is incredibly delicious, quick to make, and I'm certain it will convert the masses into stalk eaters.  I've simplified the recipe to the point where I don't measure any ingredients, and it all comes together in one bowl.  The trick is two-fold: 1) mix the sauce in the bowl you plan to eat from, and 2) add the matchstick-sized stalks into the pot halfway through the soba noodle cooking time.  Once the stalks and noodles are done, you can rinse with cold water and drain.  Toss the sauce, noodles, and stalks together, and enjoy!

Friday, August 21, 2015

Plum Yum

The inevitable happened.  My car broke down while I was driving downtown, with a baby passenger in the back seat.  I was stopped at an intersection, and suddenly my 13-year old car closed its eyes and flew up into car heaven, leaving me, baby, and our nice picnic lunch stranded in a sea of traffic.

We have been shopping for a replacement, but these things take time.  Surprisingly, I've been enjoying this new car-free life.  Walking to my daughter's daycare with her alongside is one of the highlights of my day.  Everything is interesting to her: snails, flowers, big trucks, fruit trees, and stray cats.  On some days after dropping her off, I walk over to the nearby farmers' market and ogle the freshly picked fruits and vegetables.  It was there that I tasted plums that were incredibly sweet and juicy, not at all like the dry and bland fruits that I remember them to be.  Our house has not been plum-free since.

And yet, a small family such as ours can only eat so many fresh plums.  That's when it's time to cook them into warm, soft, sweet, jammy plum foods.  Here is a short round-up of my favourite plum recipes:

- Black Plum Preserves
- Plum Clafoutis
- Purple Plum Torte
- Sugar Plum Crepes

Wishing you plums aplenty before the summer's end!

Tuesday, August 4, 2015

A Sour Cherry Summer

Our one and only family car hasn't been so dependable lately.  I'm not a mechanic or car expert, but I'm pretty sure that this much stalling, shaking, and questionable brake functioning is not normal.  Neither is the scared-for-my-life feeling I get every time I have to take it for a drive.  So when my close pal asked me if I was interested in going fruit picking at a farm outside the city, I had to decline because I had no way to get there.  Bah.

Then again, my close pal is my close pal for a reason.  A week later, she offered to split a 4.5 kg pail of fresh, pitted Montmorency cherries with me.  Sour cherry preserves, sour cherry sodas, sour cherry-topped cheesecake, and sour cherry all-day snacking are on my to-do list.  So are these not-too-sweet sour cherry ice pops, which are every bit indulgent and creamy as they are free of big icy shards that makes homemade popsicles painful to love.


Sour Cherry Creamsicles
Makes ten 3 oz popsicles.  Half of the recipe makes eight kid-sized 2 oz popsicles (as shown in photo).

I like to leave the cherries in halves, as it gives these popsicles a striking look and adds a fun texture.  If you don't care for the icy crunch, and would prefer a smoother, creamier popsicle, you can substitute for chopped or pureed cherries.

2 cups sour cherries, pitted and halved
6 tbsp (70 g) sugar
2 tsp lime juice (about 1/2 of a small lime)
1 package (250 g) cream cheese
1/2 cup plain greek-style yogurt

In a small saucepan, heat the sour cherries and sugar on medium until the sugar has dissolved.  Mix in lime juice and cream cheese, and beat out as many lumps as you have patience for with a wooden spoon.  Stir in the yogurt and mix well.  Pour into popsicle molds, insert sticks, and freeze for at least 4 hours or until solid.

Friday, March 20, 2015

Feel Good Food

A friend of mine recently came over to my house with a hearty vegan stew for lunch, and reminded me how nourishing and satisfying these simple whole foods can be.  Ever since then, I have been dreaming of fresh, less processed food.  The kind that fills your belly, but makes you feel light and happy for the rest of the day.

Bircher muesli is just that.  A few choice ingredients, uncooked and cold soaked for a few hours, melding their flavours and textures together in a subtle way.  It makes for a lovely breakfast meal, but I've been really enjoying it as a mid-afternoon or evening snack when I'm craving something sweet.

Bircher Muesli
Adapted from Super Natural Every Day by Heidi Swanson.  Serves 1 (see note below).

The original recipe suggests the amounts below would serve one, however I'm always wanting more after I've eaten a single portion, so I always double it.  This is my personal favourite combination, but of course you are free to substitute the nuts, seeds, dairy, and fruit for any sort you like.  Don't skip out on the dates, though: they melt into the liquid overnight, giving up a sweet soft texture that really makes this muesli shine.

1/2 cup (50 g) old-fashioned oats
1 tbsp (10 g) hulled raw sunflower seeds
1/2 tsp flax seeds
3 dried dates, each chopped into 4-6 pieces
1/4 cup greek-style plain yogurt
1 tsp maple syrup, or more to taste
1/4 tsp ground cinnamon

Place all ingredients, except the apple, into a bowl.  Add 1/2 cup of water, and mix well.  The consistency should be fairly runny.  Place in the fridge for at least 2 hours, or better yet, overnight.  Stir again, and enjoy with an extra drizzle of maple syrup if you're in the mood.

Wednesday, February 25, 2015

Walnuts

Thinking back when I was a kid, my mother ate a lot of walnuts.  She kept a grocery bag of walnuts under the kitchen sink, and from time-to-time, would take some out and crack them with her silver nutcracker to expose the brain-shaped nutmeat inside.  In fact, she told me walnuts were a brain food of sorts, which is why she ate them so often.  I never particularly enjoyed eating walnuts, but then again, I never tried crunchy candied walnuts flecked with sesame seeds until this week.

I made this walnut recipe as a part of a snack-set for Chinese New Year, along with chewy cubes of baked new year cake and buttery sesame sable cookies.  The walnuts disappeared within minutes of being served.  I bet they would also go nicely alongside a cheese plate, or crumbled atop a salad.


Candied Sesame Walnuts
Adapted from All Recipes.  Makes a small snack for 2.

1-1/4 cups (100g) shelled walnut halves
vegetable oil for deep-frying, enough for 2 inches of oil in a small sauce pot
2 tbsp sugar
2 tsp raw sesame seeds, toasted for 5 mins at 350F
a pinch or two of kosher salt

Fill a small pot with a few inches of water, and bring to a boil.  Add walnuts, and boil for 2 minutes.  Drain walnuts using a strainer, and place in a medium-sized bowl.  While the walnuts are still hot, toss with sugar to coat.

Clean the small pot, and wipe dry.  Fill with 2 inches of vegetable oil, and turn up to medium-high heat.  Wait until the temperature reaches 350F; alternatively if you don't have a candy thermometer to check the temperature, put one walnut into the oil as a test.  If the oil is hot enough, it will bubble furiously when the test walnut is added.  When the oil is hot enough, place the nuts into the oil, being careful not to splash the hot oil.  Wait 3 minutes, and then check the colour of the walnuts for doneness.  If the walnuts are just turning a medium brown colour, they are ready.  If they still look pale, keep them in for another minute or two, checking constantly to avoid burning.

Once the walnuts are nicely browned, remove them with a slotted spoon and place into a clean strainer over a bowl.  Shake for a few seconds to remove excess oil, and pour the walnuts into a separate clean bowl.  Toss with salt and sesame seeds while they are still hot.  Cool completely before serving.  Store in an airtight container for up to 3 days.

Saturday, November 8, 2014

Breakfast Chocolate

A quick breakfast recommendation (and fuzzy, dark accompanying photo) for this rainy, cold weekend.  My friend over at Scribbles in Toronto turned me onto this great recipe for Parisian hot chocolate: heat up milk, add dark chocolate, melt, simmer, and serve.  I tried it this morning; not as hot chocolate, but cooled overnight in the fridge and drizzled over small crepes with fresh raspberries and sliced bananas.  If you're not a crepe maker, I'm quite certain that a nice, chewy baguette would make a killer substitute.

Friday, June 20, 2014

Finding Balance

On Tuesday, I returned from a 48-hour business trip to New Jersey, and I feel rather sick.  I'm quite certain it was the food.  Every meal I ate there was very rich and , and it seemed there were no other options.  On the second night, determined to have something on the lighter side, I had it in my mind that I would order only a soup and vegetable side from the hotel steakhouse.  What I ate: creamy lobster bisque with deep fried ravioli, and a side of parmesan asparagus gratin.  Feeling heavy, I went back to my hotel room and slept for 2 hours.  Everything tastes better with butter, cream, and cheese?  I beg to differ.

Now that I'm home, I've been seeking a good counterbalance.  This light salad seems to do it for me.  It's a meal version one of my favourite simple summer salads (bocconcini, tomato and basil), and is the perfect accompaniment to picnics, barbeques, or otherwise hot days and nights.

Early Summer Bocconcini Salad 
Makes 2 small meal-sized or 4 side servings.

If you have the time, substitute the pasta for cubed bread sauteed lightly in oil, for a killer panzanella salad.

2 handfuls of fusilli pasta, uncooked
5 small bocconcini balls (100 g), sliced into medallions
1/4 cucumber, sliced and cut into quarters
1 small ear of corn, kernels removed
1 tomato, sliced into wedges and then halved
4 chives, snipped into small bits
2 bunches of basil, leaves removed and chiffonade
Juice of 1/2 lemon (or a lime, in a pinch)
1 good glug of good quality olive oil
Salt and pepper, to taste

Bring a large pot of water to a boil, add a nice big pinch of salt, and add uncooked pasta.  One minute before the pasta is al dente, add the corn kernels.  Drain, and rinse well in cold water.

In a large bowl, toss all ingredients together.  Serve immediately, or cover and chill in the fridge for an hour prior to serving.

Thursday, September 5, 2013

Farewell Summer


Although the Labour Day long weekend doesn't officially mark the end of summer, it sort of is.  It certainly signals the start of school, and even now as a 30-something adult, this time of year still makes my stomach turn.  Don't get me wrong though, I love that autumn brings in cool weather, calm serenity and muted colours.  It's just hard not to love the summertime, when everything is alive and fun is so easy to come by.  But nothing lasts forever, and perhaps never having enough is exactly what makes it so good.

With the end of summer near, I'm not sure if I'll be able to make good on my promise of finishing my bakery map-guide.  Boo.  I'll likely be busying myself with canning and preserving in the coming days, and I've been talking big about cooking a half bushel of roma tomatoes into sauce.  I am over the moon for tomatoes right now.  Simple tomato salads piled sky high with fresh herbs are easily my new favourite dinners.  Panzanella with lots of basil if I have a good chewy bread to spare.  Tabbouleh when I'm in the mood for parsley and mint.  But on most nights, a huge village salad with a side of pasta or bread feels just right.

Heirloom Village Salad
Makes 2 meal-sized or 6 side servings.

If you can find them, use colourful heirloom tomatoes and purple bell peppers to make this salad really pop.  If using dried black olives, use only 1/4 cup as they tend to be saltier.  I find that the feta and olives lend enough salt to the salad, but if it's not enough, feel free to add salt to taste.

4 medium heirloom tomatoes, sliced and halved (or 2 pints of cherry tomatoes, halved)
1 large field cucumber, sliced in quarters lengthwise, deseeded, and cut 1" thick
1 purple bell pepper, cut into 1" chunks
1 small red onion, quartered and sliced thin
1/2 cup pitted and sliced black olives
1/2 cup crumbled or cubed feta cheese
30 large fresh basil leaves, julienned
4 long sprigs of fresh oregano, leaves only
2 tbsp extra-virgin olive oil
1 tbsp fresh lemon juice
Freshly ground black pepper

Toss the prepared tomatoes, cucumber, pepper and onion pieces into a large bowl.  Scatter olives and feta over top, and pile the basil and oregano high in the centre.  Drizzle the olive oil and lemon juice evenly, and finish with a generous sprinkle of black pepper.

Saturday, December 1, 2012

Dessert For Breakfast

Like many of you, I spend a fair amount of my web surfing time browsing through photos of food.  Because the next best thing to enjoying food in my mouth is enjoying food with my eyes, yes?  Most of the photos I look at are admired but grazed over, some of it gets an audible "mmm" reaction, but only a select few manage to burrow under my skin and won't dislodge unless I take some action.

Salted caramel apple tart is the latest subject of my daydreams.  I love pies and tarts already, but now it has salted caramel?  And apple pie... such nostalgic, sweet soul food, perfectly fitting for this brisk autumn weather.  I find myself dreaming of salted caramel apple tart all day, every day.  I know what must be done to quiet the beast, but there's hesitation.  You see, lately I've been having a string of bad luck in the kitchen.  Forgetting baking powder in a pumpkin loaf, adding too much flour to banana muffins, adding too little butter to graham cracker crust... it's left me with a dwindling confidence and a lot of not-so-tasty mistakes to be eaten by my lonesome.  On top of that, I can't seem to convince myself that making a whole tart for no special occasion is somehow a good idea.

So instead of salted caramel apple tart for no special occasion, I make salted caramel apple buttermilk pancakes for Sunday breakfast.  It feels even more like dessert if you drizzle the caramel between each pancake, like a layer cake.  I even went so far as to using a lightly buttered 6" cake ring to mould each pancake to the same size.


A word of warning: this is expert level breakfast making for those who have time and patience to spare.  Yes, it is worth it, just don't attempt to make this on an empty stomach or just before going to work.  And please, do not multitask while making the caramel, or you may end up with a pot of thick black goo.  I recommend making the caramel first, then pancakes, then when you're halfway through the pancake batter, the apples.


Apple Buttermilk Pancakes with Salted Caramel
Recipe adapted from Martha Stewart and The Brown Eyed Baker.
Makes 1 large stack of 6 pancakes, enough for 2 people to share.

For the salted caramel sauce:

2/3 cup sugar
4 tbsp unsalted butter
1/4 cup whipping cream
1/4 tbsp flaked salt, such as Maldon (plus a few more pinches for sprinkling)

Heat the sugar in a saucepan over medium-high heat, stirring constantly.  Once the sugar has melted, stir occassionally but keep an eye out as it can brown very suddenly.  Cook until the colour is a medium amber colour, around 350F.  Remove from heat, add butter and stir, being careful as it can splatter.  Add cream slowly while stirring, and then mix in salt.  Place the pot back onto the element, but this time on the lowest heat setting to keep the sauce pourable and not too thick.

For the pancakes:

1 cup all-purpose flour
1 tsp baking powder
1/2 tsp baking soda
1/4 tsp salt
1 tbsp sugar
1 egg, lightly beaten
1-1/2 cups buttermilk
1 tbsp vegetable oil (plus more to oil the skillet)

Combine flour, baking powder, baking soda, salt and sugar in a large bowl.  Add egg, buttermilk and vegetable oil, and mix only until combined.  The batter should be lumpy.

Heat skillet on medium heat.  When the skillet is nice and hot, add a teaspoon of vegetable oil to coat the bottom.  Place a lightly oiled 6" cake ring in the centre (if using), and pour in about 1/2 cup batter.  Cook for about 3 minutes, until the top is bubbling and sides look dry.  Remove the ring (if using), flip, and cook the second side for another 3 minutes until golden brown.  If you want to keep the pancakes warm, store them in a warmed oven while you're making the next pancake.

For the apples:

2 firm, crisp apples (such as Gala), cored and sliced into 8-12 pieces
1 tsp butter
A sprinkle of sugar

When you have about 1-1/2 cups of pancake batter left to cook, heat a second skillet over medium-high heat.  Add butter and apples, and stir to coat.  Once apples start to brown slightly after a few minutes, sprinkle with sugar.  Turn apple slices to caramelize both sides.  Remove from heat once apples slices are golden brown.

To assemble:

Place one pancake on a plate, and drizzle with caramel.  Place another pancake on top, and drizzle with caramel.  After every third pancake, add a light sprinkle of flaked salt.  Repeat, until you have a nice tall stack of pancakes layered with caramel.  When you add the last pancake to the stack, pile on half of the apples, then drizzle caramel, then the rest of the apples, then more caramel and a final sprinkling of salt.

Sunday, November 11, 2012

Thanksgiving Camping


When I was abroad last year, one thing I really missed about home was the beautiful natural landscape of Canada.  The diversity from east to west, through the four seasons, and most of it untouched and wild.  Often we don't appreciate what's right in front of our face, until it's not there any more.


All this lofty talk, yet I haven't ventured "out there" since we moved back.  So my partner and I decided to leave the city behind this past Thanksgiving weekend (sorry, Mom and Dad), and instead spend it at Killbear Provincial Park, a scenic 3 hour drive north of Toronto.

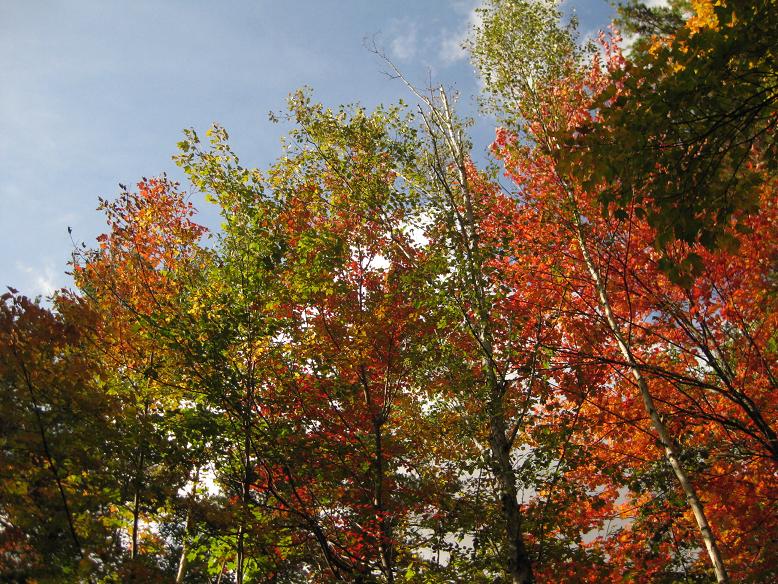
It was rainy and chilly, and there was no pumpkin pie or turkey stuffing to be et, but it was worth it.  We cherished moments spent by the warm fire, waking up in a dry tent wrapped up in a snug sleeping bag, hearing the sound of rain drops hitting the tarp, and the ever present fall tree colours.  We went for day hikes, spotted white-tailed deer, climbed over huge rocks by the bay, watched a woodpecker knock on dead logs, picked acorns, and gazed at the brilliant stars at night.


And of course, cooking on an open wood fire.  There's nothing better than the earthy smell of burning wood, and the charcoal taste of hot camp food.  Bannock is a particular favourite; a traditional First Nations staple that is easy to make, very light to carry, and real tasty.  If you lost your utensils in the forest, you can cook it with a stick.  Stick bannock is snack-sized and fun to make; like roasting marshmallows but without the sugar overdose.  But if you do have a skillet on hand, trust me: fried bannock sandwich with eggs and cheese makes for a killer greasy breakfast.  If you like that sort of thing.


Bannock
Recipe adapted from Parks Canada.
Makes 10 medium-sized pieces.

3 cups all-purpose flour
3 tsp baking powder
pinch of salt
3 tbsp cold butter
1 cup cold water
optional ingredients: oil or fat for frying, and/or sugar, cinnamon, raisins

Make at home: mix flour, baking powder and salt.  Cut in cold butter until pea-sized pieces are left, as you would making a pie crust or biscuits.  Store in cooler until you arrive at your campsite.

When you're ready to eat, add the cold water to the flour mixture and knead well.  Roll into a ball, cover, and rest 10 minutes.  Divide into 10 pieces.  From here, choose your own adventure: fry on a skillet, or bake on a stick.

Skillet-fried bannock: shape dough pieces into circles, and press flat.  Score lightly with a sharp knife in a criss-cross pattern.  Heat a skillet over hot coals, and coat the bottom with oil or fat.  Cook dough circles on the hot skillet, a few minutes each side, until golden brown.

Stick-baked bannock: roll dough pieces into long snakes.  If making cinnamon-raisin bannock, flatten the dough snakes and sprinkle a spoon of sugar, some cinnamon and a few raisins down the middle, and fold width-wise so sugar-cinnamon-raisins are left in the centre.  Wrap the dough snake, telephone cord style, around the end of a long stick.  Pinch the ends to secure.  Cook over hot coals, turning to brown on each side for a few minutes each.

Saturday, June 30, 2012

Ginger-vitis

It's been a while since my last post.  I haven't quite felt like myself lately, and unfortunately my energy and appetite levels have really suffered.  I'm happy to say that I'm slowly coming to, and hope to be back into the regular swing of things in the next few weeks, along with catching up on crafty projects.  But first, I really should give thanks to one of the few who helped me get back onto my feet: the humble ginger root.


My relationship with ginger started out quite difficult.  As a child, my accidental encounters with ginger were quickly followed by a scrunchy face and spitting reaction.  Luckily when I got older, I found ways to enjoy the strange pale yellow tuber.  I liked the pretty pink pickled ginger served at Japanese restaurants, and the way it delivered a sweet and refreshing kick in the mouth.  I discovered ginger beer at the Jamaican patty shop, likening it to a spicier and bolder version of ginger ale.  And of course, hot ginger tea with honey or rock sugar became my go-to homemade cure for stomach aches.


Today, you'll always find a piece of fresh ginger in my fridge.  I use it in masala chai, salad dressing, or to spice up a simple soup.  And it's always handy to have when an upset stomach strikes unexpectedly, which I've been having more often than I'd like to of late.  On the worst days, I can't even bring myself to make a simple ginger tea.  So I pre-made ginger snaps and ginger syrup, both of which can keep for a few days and are ready-to-eat when a tummy ache strikes, but it turns out that these recipes are great for any time if you're a ginger lover.

The ginger snaps are a hundred times better than your store bought variety, because they're packed with 3 kinds of ginger: powder, fresh and candied.  For extra potency, throw in a little extra of each, and I guarantee these snaps will blow your mind. You can easily make the recipe vegan by substituting the egg for flax meal and water, and the butter for half applesauce, half vegetable oil.

The ginger syrup is brilliant when mixed with drinks -- club soda, orange juice, hot water, Wild Turkey, you name it.  I recommend fresh lemon juice, mint leaves, soda water and ice cubes.  It tastes like summer. You can even drizzle some syrup on granola and yogurt, or whizz it in to sweeten a fruit smoothie.